Saturday 26 December 2009

HAPPY 2010

Photobucket

This tutorial was written by me and any resemblance to any other tutorial is purely coincidental.

It would be nice if you let me know you have tried my tutorials I love to see what you do with them, send me a copy and I will add them to my slide show.

Supplies needed:

PSP (I used PSP 9) but should work on any
Animation Shop
Filters used: DSB Flux

Tube of choice I am using the brilliant artwork of Elias Chatzoudis if you wish to use his artwork then you need to purchase a license from: http://www.mypsptubes.com/

The Scrap kit I used is by Monica and it’s called Bling in The New Year (FTU) and you can get it from: http://simplysensationalscraps.blogspot.com/

The mask I used is WSL_Mask 167 and came from Chelle at http://weescotslasscreations.blogspot.com/ thanks again Chelle

Okay lets get started

Open a new image 700 x 700 we can resize later flood fill white

Copy & Paste the Frame 6 with your magic wand click inside the frame Selections – Modify and Expand by 4 copy and paste a paper of choice I used paper 21 into selection – Select none and drop the paper below the frame and drop shadow the frame.

Now click on and make active your background layer and Copy and Paste Paper 18 then Layers – Load/Save Mask – Load Mask from Disk and locate WSL_Mask 167 and okay make the group layer active in your layer palette and right click and merge group (stretch the mask as necessary using the Raster Deform tool so it shows on all sides below the frame) then copy and pasting elements of your choice I used Confetti 1 & 2 and fireworks 1, 2, 3, and 4 and also Glitterswirl 3 (rotating it by 90% and placing it under and to the right of the frame) again stretching them till they show beneath the frame I placed the fireworks to the left of the Tag but move them around till you are happy with the way it looks then making the top layer of these elements active(Confetti 1 & 2 and Fireworks 1, 2, 3, & 4 and glitterswirl 3) merge down till they are all on the same layer name this Layer Fireworks

Make your frame layer active and using the magic wand click inside then Selections – Modify and expand by 4 then choosing the close up of the tube copy and paste it into your frame place it where you think it looks best ( I mirrored mine) then Selections – invert and hit delete on your keyboard make the tube layer active and right click in the layer palette and Properties change the blend mode to Screen add the other Elements (resizing as necessary),– see mine for reference. I used Balloons 1, 2, and 3, 4, 5, I reduced in size 80% placing them and mirror them so the ribbons are not over your tubes face, then I added glasses placing them to the left of the frame next I added the wordart and resized it placing it over the frame and rotating it a bit, I gave the wordart a gradient glow of 3 to make it show up a bit more

Copy and paste your tube and place her to the right of the frame Add a drop shadow of your choice to all layers I use 3, 3, 50, 5, black

Image – Resize – All Layers checked 500 x 500 Smart size

Add the artists copyright and your watermark then add your name I used the Font Aquarelle choosing a colour from your tube with a stroke of 1

Animation

Click on you’re the Frieworks layer and Effects – Plugins – DSB Flux – Bright Noise and set the intensity to 40 and with Mix checked click on mix once and Copy-merged and take it to Animation Shop and Edit – Paste as a new animation back to PSP and click undo once then Effects – Plugins – DSB Flux – Bright Noise and click on Mix twice and Copy – Merged and over to AS and Edit – Paste after the current frame do this a third time clicking on mix three times and take it to AS and Edit – Paste after current frame you now have 3 frames click on the first frame and Edit – Select all then Animation – Animation properties check the opaque box and change the colour to white click okay.

View your Tag and if happy save as a Gif.

Thank you for trying my tutorial.

Lyn

Monday 21 December 2009

BLING IN THE NEW YEAR

Photobucket

This tutorial was written by me and any resemblance to any other tutorial is purely coincidental.

It would be nice if you let me know you have tried my tutorials I love to see what you do with them, send me a copy and I will add them to my slide show.

Supplies needed:

PSP (I used PSP 9) but should work on any
Animation Shop
Filters used: DSB Flux


Tube of choice I am using the beautiful artwork of Ray Leaning if you wish to use his artwork then you need to purchase a license from: http://www.mypsptubes.com/

The Scrap kit I used is by Silky and it’s called Bling in The New Year (FTU) and you can get it from: http://designsbysilky.blogspot.com/ when downloading Silky’s kit you have to download all 3 parts


Okay lets get started

Open a new image 700 x 700 we can resize later flood fill white
Copy & Paste the Frame which is embellishment 03 – resize it by 50% twice now with your magic wand click inside the frame Selections – Modify and Expand by 4 copy and paste a paper of choice I used paper 12 into selection – Select none and drop the paper below the frame and drop shadow the frame.


Now click on and make active your background layer and Copy and Paste Elements (resizing as necessary) of your choice I used Firework 03, 02, 04, 38 move them around till you are happy with the way it looks

Make your top layer active and add the other Elements (resizing as necessary), 05-glass, 25-silver bell, 33 – corner decal = mirrored, 83-group of gold stars, ribbons-72, 74, 75, 86, 65, and add the silver star 78 to the top of all the ribbons – see mine for reference.
Copy and paste your tube if using the same tube as me I mirrored the tube
Add a drop shadow of your choice to all layers I use 3, 3, 50, 5, black

I then used my selection tool on the word art and copied and pasted each word and resized it to fit in the frame

Image – Resize – All Layers checked 500 x 500 Smart size

Add the artists copyright and your watermark then add your name I used the Font Blue Melody on pattern using a glitter tile the same colour as the word art click on the top word art layer in your layer palette and merge down and again do this till you have all the word art and your name and the big silver star on the same layer.

Animation

Click on you’re the word art layer and Effects – Plugins – DSB Flux – Bright Noise and set the intensity to 40 and with Mix checked click on mix once the Copy-merged and take it to Animation Shop and Edit – Paste as a new animation back to PSP and click undo once then Effects – Plugins – DSB Flux – Bright Noise and click on Mix twice and Copy – Merged and over to AS and Edit – Paste after the current frame do this a third time clicking on mix three times and take it to AS and Edit – Paste after current frame you now have 3 frames.

View your Tag and if happy save as a Gif.

Thank you for trying my tutorial.

Lyn

Tuesday 15 December 2009

CHRISTMAS BEAUTY

Photobucket

This tutorial was written by me and any resemblance to any other tutorial is purely coincidental.

It would be nice if you let me know you have tried my tutorials I love to see what you do with them, send me a copy and I will add them to my slide show.

Supplies needed:

PSP (I used PSP 9) but should work on any
Animation Shop


Tube of choice I am using the beautiful artwork of Jessica Dougherty if you wish to use her artwork then you need to purchase a license from: www.cilm.com

The Scrap kit I used is by Bel Vidotti and it’s called Christmas Around The World (FTU) and you can get it from: Bel Vidotti Scraps

The mask I used is WSL_Mask117 thanks Chelle and you can download it from her site http://weescotslasscreations.blogspot.com/ and the other Mask is Vix_Mask305 thanks Vix and you can download it from her site http://vixpsp.blogspot.com/

Okay lets get started

Open a new image 700 x 700 we can resize later flood fill white
Copy & Paste the Frame which is embellishment 04 – resize it by 50% twice and then by 80% and move it up slightly now with your magic wand click inside the frame making sure you get the little bits around the ribbon then Selections – Modify and Expand by 4 copy and paste a paper of choice I used paper 03 into selection – Select none and drop the paper below the frame and drop shadow the frame.

Make the Frame layer active and click inside with your magic wand again and Selections – Modify and expand by 4 then copy and paste resize if necessary your tube move it around till you get it just how you want it, if using the same tube as I did then I resized it by 80%

Now click on and make active your background layer and Copy and Paste a paper of your choice I used 05 then Layers – Load /Save Mask – Load Mask From Disk and look for WSL_Mask117 and apply – right click on the group layer in your layer palette and merge group I used the Raster Deform tool and stretched it a little on all sides now make your paper layer inside your frame active and copy and paste Element 51 resizing by 50% three times.

Make your background layer active and copy and paste element 18 resize it by 50% and then by 70% and place it to the left then duplicate it and Image – mirror copy and paste Element 17 resizing it by 50% and again by 70% and place in the middle of the other trees (see mine for reference) now copy and paste element 43 resizing it three times by 50% place it on the right and rotate it slightly add whatever presents you would like on the left resizing them all different

Make your Mask layer active and add a new layer then Selections – Select all and copy and paste the glitter paper 06 into selection – Select None then Layers – Load/Save Mask – Load Mask from Disk and look for Vix_Mask305 and apply, right click on the group layer in your layer palette and merge group

Add a drop shadow of your choice to all layers I use 3, 3, 50, 5, black

Image – Resize – All Layers checked 500 x 500 Smart size

Add the artists copyright and your watermark then add your name I used the Font Igloo Caps using a colour to match the kit and giving it a Stroke of 1 with your Fill on white

Animation

Click on your glitter mask layer and duplicate twice so you have 3 layers and click on the beads and do the same with your freehand selection draw round all the glitter parts of the frame that are showing when you have all the parts selected then duplicate twice so you should have 3 layers of the glitter mask, the beads and of the frame now X out 2 and 3 of each of the beads layer and the mask layer and the frame layer now Adjust – Add noise and set it to Guassian 30% now X out all the 1st layers and Un-X the second layers and do the same again but change it to 35% and ok and doing the same again with 1st and second layers X’d out and 3rd layer of all Un-X’d and this time change the % to 40 and okay.

View your Tag and if happy save as a Gif.

Thank you for trying my tutorial.

Lyn
Monday 7 December 2009

WINTER ANGEL

Photobucket


I loved this Scrapkit so much I had to use it in this tutorial…..hope you all don’t mind.

This tutorial was written by me and any resemblance to any other tutorial is purely coincidental.

It would be nice if you let me know you have tried my tutorials I love to see what you do with them, send me a copy and I will add them to my slide show.

Supplies needed:

PSP (I used PSP 9) but should work on any
Animation Shop
Filters used:
VM Natural Sparkle
Alien Skin Xenofex 2 - Constellation
EyeCandy 4000 - Gradient Glow

Tube of choice I am using the beautiful artwork of Lorenzo Sperlonga if you wish to use his artwork then you need to purchase a license from: www.cilm.com

The Scrap kit I used is called Winter Angels (FTU) and you can get it from: http://artmamasstudio.blogspot.com

The mask I used is WSL_Mask119 thanks Chelle and you can download it from her site http://weescotslasscreations.blogspot.com/

Okay lets get started

Open a new image 700 x 700 we can resize later flood fill white
Copy & Paste the Frame which is embellishment 02 – resize it by 50% and move it up a bit and to the left and using your Raster Deform tool turn the frame (see mine for reference) now with your magic wand click inside the frame then Selections – Modify and Expand by 4 then copy and paste a paper of choice into selection – Select none and drop the paper below the frame and drop shadow the frame.

Make the Frame layer active and click inside with your magic wand again and Selections – Modify and expand by 4 then copy and paste your tube move it around till you get it just how you want it then Selections – Invert and hit delete on your keyboard now make your tube active and Selections – Modify – Feather and change the number of pixels to 50 tap the delete button until you have the featherd effect you would like I tapped twice.

Now click on and make active your background layer and Copy and Paste a paper of your choice then Layers – Load /Save Mask – Load Mask From Disk and look for WSL_Mask119 and apply – right click on the group layer in your layer palette and merge group I used the Raster Deform tool and stretched it a little on all sides, now Copy and Paste your main tube placing her to the right of the Frame

Add whatever Elements you want resizing it’s your choice I used Element 8 – snowy shrub and placed one in front of the frame and one behind my main tube Elements 39, 40, 41 (Feathers) rotating them slightly till I got them the way I wanted them behind the Frame, I also used Element 42 and resized it and placed it on both the tubes hair and with my eraser tool I removed stray bits of ribbon I copied and pasted Elements 30 & 32 placing them just above the mask.
Add the artists copyright and your watermark then add your name I used the Font Aquarelle using a colour to match the kit and giving it a Stroke of 1 with your Fill on white I also gave it a gradient glow with settings at : 3, 25, 100 and colour white
Give each layer a drop shadow 3, 3, 50, 5

Image – Resize – All Layers checked 500 x 500 Smart size

Animation
If you are using the same tube as me then go round the wings using the Freehand Selection tool then Duplicate it twice on the original one go to Effects – Plug ins – Alien Skin Xenofex 2 – Constellation and with these settings 0.85, 50, 50, 25, 50, 75 rotation 45 and make sure keep original image is checked then okay now X out the original one in your layer palette and make active your first duplication and do the same again but click on the random button and okay and X out this one too in your layer palette now go to your second duplication and again do the same clicking the random button and X out this duplication in your layer palette Now un-X the original layer and go to Effects – VM Natural – Sparkle with these settings 54, 255, 255, 255 and okay X this layer out again and Un-X the first duplication and do the same but hit the random button X this layer out again and Un-X the second duplication and doing the same again hit the random button then X out this layer you might have to watch while using the Sparkle plugin to make sure you don’t get it on the tubes face lol now Selections – Select none, Un-X the original Layer and copy merged and take it to Animation Shop and Edit – Paste as new Animation back in PSP X out the original layer and Un-X the first duplication and copy merged and take it to AS Edit – Paste after current frame back to PSP and X out the first duplication and Un – X the second duplication and copy merged and take it to AS and Edit – Paste after current frame, now Edit Select all then Animation – animation properties and check opaque and change the colour to white then Animation Frame properties and change the number to 25 – View your Animation and if happy then Save as a GifMany thanks for trying my tutorial and please leave a little luv if you enjoyed it.

Lyn

Saturday 21 November 2009

CHRISTMAS PRESENT

Photobucket


This tutorial was written by me and any resemblance to any other tutorial is purely coincidental.

It would be nice if you let me know you have tried my tutorials I love to see what you do with them, send me a copy and I will add them to my slide show.

Supplies needed:

PSP (I used PSP 9) but should work on any
Animation Shop
Filter: VanDerLee – Snowflakes
Winter scene can be got from www.freeimages.co.uk

Tube of choice I am using the beautiful artwork of Jessica Dougherty if you wish to use her artwork then you need to purchase a license from: www.cilm.com

The Scrap kit I used is called Winter Angels (FTU) and you can get it from: http://artmamasstudio.blogspot.com

The mask I used is Vix_Mask306 by Vix thanks Vix and you can download it from her site http://vixpsp.blogspot.com

Okay lets get started

Open a new image 700 x 700 we can resize later flood fill white
Copy & Paste the Frame which is embellishment 26 – resize it by 80% and move it up a bit now with your magic wand click in all the window panels then copy and paste your winter pic into selection – Select none and drop your image below the frame and drop shadow the frame.
Now click on and make active your background layer and add a new layer then floodfill with a colour from your tube and Layers – Load /Save Mask – Load Mask From Disk and look for Vix_Mask 306 and apply – right click on the group layer in your layer palette and merge group I used the Raster Deform tool and stretched it a little on all sides,
Make your Frame the active layer and copy and paste Element 08 (snowy shrub) moving it to the left of the frame and drop shadow

Add whatever Elements you want resizing it’s your choice I used Element 39,40,41 (Feathers) rotating them slightly till I got them the way I wanted them I then added the Stag ( element 27) and with my eraser tool I removed anything that was showing below the stags body, I then used Elements 45 and 46 (Doodles)colourizing one of them using a colour to match my tube rotating them 90% to the left and placed them just under the frame but above the winter scene I resized Element 30 and 32 (sparkles) to 500 x 500 and copied and pasted them over the winter scene but under the Frame and with the tube I used came the embellishment that I placed on the window and duplicated and mirrored it. Place each element where you think it looks best make it your own.
Add the artists copyright and your watermark then add your name I used the Font Christmas Trees using a colour to match the kit and giving it a Stroke of 1 with red
Give each layer a drop shadow 3, 3, 50, 5

Image – Resize – All Layers checked 500 x 500 Smart size

Make your winter image layer active and Effects – VanDerLee – Snowflakes with these settings: 100, 0, 10, 100, 0 – Basic Snow and okay then Copy Merged and take it to Animation Shop and Edit - Paste as a New Image, * back in PSP click undo once and again VanDerLee – Snowflakes but this time slide the random button a little and okay then Copy Merged and take it to AS – Edit – Paste after the current frame, you can do this * as many times as you wish I did it 10 times to get what effect I wanted but it looks great if only done 3 / 4 times, once happy Edit – Select All then Animation – animation properties and check Opaque and change the colour to white and okay the Animation – Frame properties and change the number to 30.

View your Tag and if happy save as a Gif.

Many thanks for trying my tutorial and please leave a little luv if you enjoyed it.

Lyn

Thursday 22 October 2009

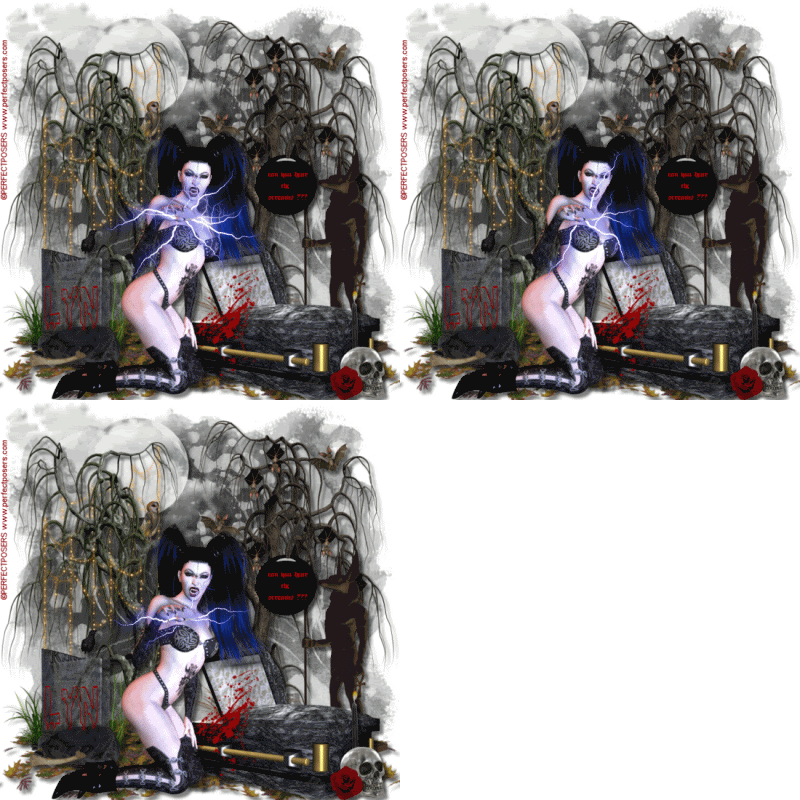
FANGTASTIC

Photobucket

Fangtastic

This tutorial was written by me, and any resemblance to any other tutorial is purely coincidental

Supplies needed:

PSP (I used PSP 9)
Animation Shop

Filter used – Alien Skin Xenofex 2 - Electrify

A tube of choice I am using the lovely artwork of © Perfect Posers www.perfectposers.com

Scrap kit I used is by http://digicats.blogspot.com/search/label/Freebie and is (FTU) till Hallows Eve

The mask I used is WSL_Mask_254 by weescotlass Chelle …..thank you again Chelle and you can get it at http://weescotslasscreations.blogspot.com/


Drop shadow used throughout 3, 3, 50, 5 black


Okay lets get started

Open a new image 700 x 700 and floodfill white.

Open your supplies and minimise & put your Mask in your Mask folder


Copy & paste paper 19 and Image –Load/Save Mask – Load mask from disk and look for WSL_Mask254 and apply in your layer palette right click on group and Merge – Merge Group, drop the opacity to 80%

Copy and paste Shrouded Moon resize and place on the top left of your Tag and drop shadow, copy and paste Spooky Tree 03 resizing by 70% or as necessary and place to the left of the tag (see mine for reference) copy and paste Spooky Tree 04 again resizing and place to the right Copy & paste Leaves I duplicated them twice and flipped one layer space them out at the front, now copy and paste the Anibus resize at 70% and place to the right then copy and paste Coffin 1 resize @ 70% and place in front of the Anibus Copy and paste Tombstone 04 resize at 70% and again at 80% and place to the left of the Tag, copy and paste Skull Candle Black resizing by 50% and place in front of the coffin, copy and paste Screams Flair resizing by 50% twice hang it on a branch of the tree and using your eraser make it look as if it’s hanging from the tree, Copy and paste Blood Splatter 03 and resize by 50% place it where you think it looks good.

Now copy and paste your tube of choice I resized by 80%

Give all layers a drop shadow and Image resize all layers to 550 x 550

Add the artists copyright and add your name I used Liquidism and placed my name over the tombstone.

If you are happy with your Tag then save as a Jpeg and your done.

You don’t have to use all the elements I have you choose which ones you want to use and make it your own

If you wish to animate then carry on.

In PSP activate the tube layer in your layer palette and using your magic wand select each fingernail then Effects – Plug-ins - Xenofex2 – Electrify
And using these settings below :

10
85
40
60
60
100
make sure Radiate from centre is checked and okay

Selections – none Edit – Copy merged and take it to Animation Shop and Edit – Paste as a new animation, back in PSP and click undo twice and do the same again but clicking the random button, Selections – none and Edit – Copy merged and take it to AS and Edit – paste after the current frame and for the third time do it all again and hit the random button and Selections – none and Edit – Copy merged and take it to AS and Edit paste – after the current frame.

Edit – Select all then Animation – Animation properties and click opaque and change the colour to white – click okay then Animation – Frame properties and change the Display time to 15, View your animation and if happy save as a Gif and your done.

Thank you for trying my tutorial and if you liked it please leave a few words in my chatbox I love to hear how you get on.

Hugs X Lyn

Tuesday 6 October 2009

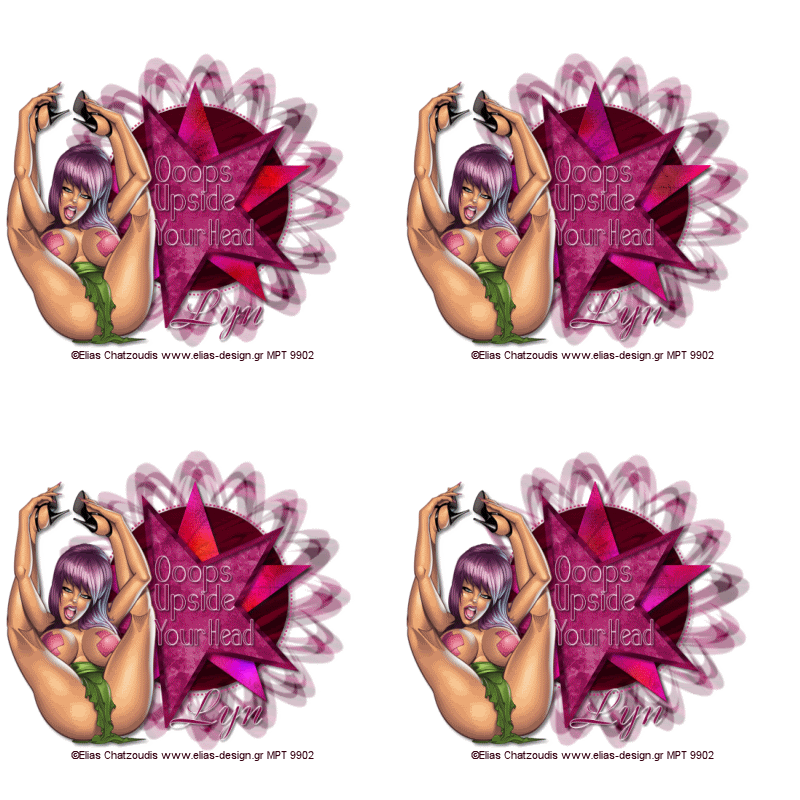
OOPS UPSIDE YOUR HEAD

Photobucket

Ooops Upside Your Head

This tutorial was written by me, and any resemblance to any other tutorial is purely coincidental

Supplies needed:

PSP (I used PSP 9)
Animation Shop

Filters: Eyecandy 4000 - HSB Noise

Tube of choice I am using the beautiful artwork of Elias Chatzoudis if you wish to use his artwork then you need to purchase a license from http://www.mypsptubes.com/

The Scrap kit I used is Burgundy Grunge by Terry from http://treasuresbyterry.blogspot.com/ …. thank you Terry

The Template I used is by Missy of http://divineintentionz.blogspot.com/thanks Missy, Missy_tagtemplate 200


The mask I used WSL_Mask 91 another fantastic mask from Chelle at http://weescotslasscreations.blogspot.com/ and you can get it


Put the mask in your mask folder

Open up Missy_tagtemplate 200 and shift D to duplicate it and close off the original, delete the copyright info and then click on the background layer – Image/Canvas size and change it to 700 x 700 and flood fill with white we can resize it later.

Add a new raster layer and Selections - select all and copy and paste into selection paper 1 from the scrapkit now find your mask and apply it then in your layers palette right click on the group layer and merge group.

Make Circle in your layer palette active and Selections – all, Selections – float, Selections – defloat and copy and paste a paper of your choice into Selection and Selections – none. Drop shadow

Do the same with the dotted circle, star, star background and Star frame
I chose paper 2 for circle paper 16 for the star, paper 9 for star background, paper 7 for the frame and paper 5 for the dotted circle. Drop shadow all

Copy and paste your tube placing it to the left of the Tag.
Drop shadow your tube.

I then typed out Oops Upside Your Head with the Aquarelle font and then typed my name I used Boulevard with a stroke of 1 for my nameand put it at the bottom of the Tag, drop shadow all. You can use whatever wording you like.

Resize your Tag to 500 x 500 and put the artists copyright info.


Open up Animation Shop.

In PSP copy merge your Tag and take it to AS Edit and paste as a new animation , back to Psp and click on the Star layer in your layer palette and duplicate it twice so you have 3 copies click on the first copy and Effects- Eyecandy 400 – HSB Noise and with the default settings click okay now click on the second copy and do the same again but this time click the random seed button and okay then click on the third copy and again hit the random seed button X out your 2nd and 3rd copies now click on the group layer and using your Raster deform tool turn the mask slightly to the right then copy merged and take it to AS and Edit paste after the current frame now back in PSP and X out your first copy of the star and un X the second copy click on your group layer and again with your raster deform tool turn the mask slightly again then copy merged and take it to AS do the same again this time X out the 1st and 2nd copies and un X the third copy using the raster deform tool again turn the mask slightly to the right and copy merged into AS you should now have 4 frames – Edit – Select all then Animation – Animation properties click on opaque and change the colour to white and okay.

View your Tag and if happy save as a Gif and your done.

Thank you again to everyone who tries my tutorial please leave a few words in my Cbox to let me know what you think.

Lyn X

Sunday 4 October 2009

JUST FOR YOU


Just For You

This tutorial was written by me, and any resemblance to any other tutorial is purely coincidental

Supplies needed:

PSP (I used PSP 9)
Animation Shop

Filter used – Alien Skin – Eye Candy 5 – Textures - Diamond Plate

A tube of choice I am using the FANTASTIC!!! artwork of Keith Garvey if you wish to use his artwork then you need to purchase a license from http://www.mypsptubes.com

The Scrap kit I used is by Mar at http://scrappingmar.blogspot.com…. thank you Mar and is called Just For You (FTU)

The mask I used is WSL_Mask192 by weescotlass Chelle …..thank you again Chelle and you can get it at http://weescotslasscreations.blogspot.com/
I have also added a bow that I had but you will have to supply your own I’m sure you have many to choose from

Drop shadow used throughout 3, 3, 50, 5 black


Okay lets get started

Open a new image 700 x 700 and floodfill white.

Open your supplies and minimise & put your Mask in your Mask folder


Copy & paste Freebie 1 paper and Image –Load/Save Mask – Load mask from disk and look for WSL_Mask192 and apply in your layer palette right click on group and Merge – Merge Group you might have to stretch the mask a bit using the Raster Defom Tool to get it to show under the Frame (see mine for reference)

Copy and paste Freebie 35 ribbon frame resizing I resized by 20% make sure your frame layer is active and using your magic wand click inside the frame then Selections – Modify – Expand by 3 and copy and paste Freebie 6 paper then Selections – invert and hit delete on your keyboard, Selections – None - drop the paper layer below the frame and making the frame layer active add a drop shadow.

Copy and paste your tube and place it over your frame – Duplicate the tube and drop the duplicated tube layer below the frame and on the original using your eraser - erase away all bits of your tube that overlap the frame.

Now comes the good bit start adding any elements you like resizing them by 20% and place them where you think they look good, I added Freebie 13, Freebie 16, Freebie 23, and I added Freebie 11 just under the frame to the left using the Raster deform tool to turn it round till I got it to where I wanted it.

Add a drop shadow to all layers except the mask layer.

Image – Resize to 550 x 550 smart size.

Add the artists copyright and then add your Name I used Aquarelle Font with a stroke of 1 and watermark.

If you are happy with your Tag as it is you can now save it as a Jpeg and your done, if you wish to animate it then carry on below.

ANIMATION

Click on the mask layer in your layer palette and Effects – Alien Skin / Eye Candy 5 – Textures / Diamond Plate - with these settings :
16
3.25
65
35
60
0
75
Texture Orientation 45

Click Okay and then copy merged and take it to animation shop – Edit and paste as a new animation – * back in PSP and click undo then Effects Alien Skin / Eye Candy 5 – Textures / Diamond Plate –and with the same settings hit the random button once and apply and copy merged and in AS – Edit and paste after current frame do the same again from *

Once you have the 3 frames in AS then Click on Animation – then Animation Properties make sure Opaque is checked and change the colour to white and apply then Animation – Frame properties and change it to 15.

View your Tag and if happy save as a Gif and your done.

Thank you for trying my tutorial and if you enjoyed it please leave me a thanks in my Cbox.

Lyn

Tuesday 22 September 2009

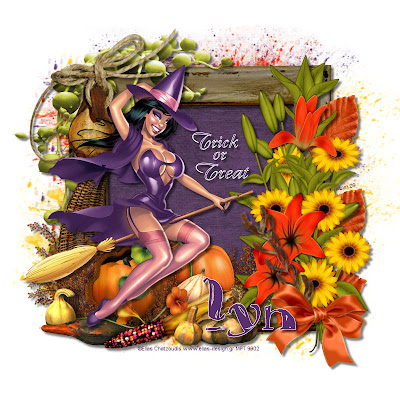
TRICK OR TREAT


This tutorial was written by me and any resemblance to any other tutorial is purely coincidental.

It would be nice if you let me know you have tried my tutorials I love to see what you do with them, send me a copy and I will add them to my slide show.

Supplies needed:

PSP (I used PSP 9) but should work on any

Tube of choice I am using the Great artwork of Elias Chatzoudis if you wish to use his artwork then you need to purchase a license from: www.mypsptubes.com

Please use a Scrapkit of choice

The mask I used is WSL_Mask192 by Chelle thanks again Chelle and you can download it from: http://weescotslasscreations.blogspot.com

Okay lets get started

Open a new image 700 x 700 we can resize later flood fill white
Add a new raster layer and flood fill with a colour from your tube then Layers – Load/Save Mask – Load Mask From Disk and look for WSL_Mask192 and apply – right click on the group layer in your layer palette and merge group I used the Raster Deform tool and stretched it a little on all sides, do the same again using a different colour and stretch it again but rotate it by 10% to the left and then do it all again but this time rotate it 10% to the right so all three colours show on all sides of your frame.(see mine for reference)

Copy and paste the Element2 (Frame) resize it and drop shadow

Click inside the frame with your magic wand and Selections – Modify and Expand by 2 then add new Raster layer and floodfill with a colour from your tube drop this layer below the frame and make your frame layer active and drop shadow.

Add whatever Elements you want resizing it’s your choice I used Element 15, Element 1, Element 22, Element 24, Element 3, Element 5 and Element 8. Place each element where you think it looks best make it your own.

I also added Trick or Treat to the inside of the frame.

Give each layer a drop shadow 3, 3, 50, 5

Image – Resize – All Layers checked 500 x 500 Smart size

Add the artists copyright and your watermark then add your name I used the Font Boulevard using a colour to match the kit and giving it a Stroke of 1 with white

Save as a Jpeg and your done.

Many thanks for trying my tutorial and please leave a little luv if you enjoyed it.

Lyn

Monday 21 September 2009

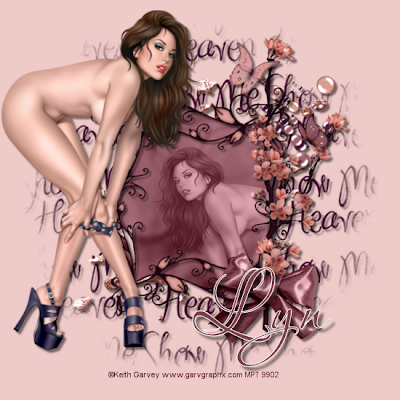
SHOW ME HEAVEN


This tutorial was written by me and any resemblance to any other tutorial is purely coincidental.

This is a quickie !!!

It would be nice if you let me know you have tried my tutorials I love to see what you do with them, send me a copy and I will add them to my slide show.

Supplies needed:

PSP (I used PSP 9) but should work on any

Tube of choice I am using the Fantastic artwork of Keith Garvey if you wish to use his artwork then you need to purchase a license from: www.mypsptubes.com

The Scrap kit I used is called Whispers in the Wind (FTU) and you can get it from: http://myjuicybits.blogspot.com

The mask I used is WSL_Mask198 by Chelle thanks again Chelle and you can download it from: http://weescotslasscreations.blogspot.com

Okay lets get started

Open a new image 700 x 700 we can resize later flood fill white
Add a new raster layer and copy and paste a paper of your choice I used paper 21 then Layers – Load/Save Mask – Load Mask From Disk and look for WSL_Mask198 and apply – right click on the group layer in your layer palette and merge group I used the Raster Deform tool and stretched it a little on all sides.

Copy and paste the Glitter 01 and drop shadow place it to the right of the Tag and do the same with Bubbles04 then resize and copy and paste Frame 04.

Click inside the frame with your magic wand and Selections – Modify and Expand by 2 then copy and paste a paper of your choice I used Paper 02 – Selections – invert and hit delete on your keyboard then drop the paper layer below the frame and drop shadow your frame.

Now add your tube (I cropped the tube then increased the size to fit inside the frame and then used my eraser tool to remove any overhang at the bottom and side of the frame I also reduced the Opacity to 60% and applied Luminance Legacy I then copied and pasted the tube again increasing the size and mirrored it (see mine for reference)

Add whatever Elements you want resizing it’s your choice I used Blossom 01, Bow01, Butterfly 04 and Butterfly 07. Place each element where you think it looks best make it your own.

Give each layer a drop shadow 3, 3, 50, 5

Image – Resize – All Layers checked 500 x 500 Smart size

Add the artists copyright and your watermark then add your name I used the Font Aquarelle using a colour to match the kit and giving it a Stroke of 1 with white

Save as a Jpeg and your done.

Many thanks for trying my tutorial and please leave a little luv if you enjoyed it.

Lyn

Wednesday 26 August 2009

DIAMOND BLUE


This tutorial was written by me, and any resemblance to any other tutorial is purely coincidental.

It would be nice if you let me know you have tried my tutorials I love to see what you do with them, send me a copy and I will add them to my slide show.

Supplies needed:

PSP (I used PSP 9)
Animation Shop

Filters:

Alien Skin Eye Candy 5 - Impact - Brushed Metal
VM - Natural - Sparkle

Tube of choice I am using the beautiful artwork of Keith Garvey if you wish to use his artwork then you need to purchase a license from www.mypsptubes.com

The Scrap kit I used is called Diamond Blue (FTU) by Doris of Scrap Dimensions, thank you Doris …. And you can get it from http://scrapsdimensions-dorisnilsa.blogspot.com/
The mask I used is WSL_Mask86 by Chelle thanks again Chelle http://weescotslasscreations.blogspot.com


Okay lets get started

Open a new image 700 x 700 we can resize later flood fill white
Add a new raster layer and copy and paste a paper of your choice I used paper 06 then Layers – Load/Save Mask – Load Mask From Disk and look for WSL_Mask86 and apply – right click on the group layer in your layer palette and merge group I used the Raster Deform tool and stretched it a little on all sides.

Copy and paste the Glitter petals2 and dropshadow place it to the right of the Tag duplicate it and image – mirror then merge down so both layers of the Glitter petals are on 1 layer (see mine for reference) then resize and copy and paste Frame 2.

Click inside the frame with your magic wand and Selections – Modify and Expand by 5 then copy and paste a paper of your choice I used Paper 9 – Selections – invert and hit delete on your keyboard then drop the paper layer below the frame and drop shadow your frame.

Now add your tube (I cropped the top of the tube then increased the size to fit inside the frame and then used my eraser tool remove any overhanging at the bottom of the frame

Add whatever Elements you want it’s your choice I used Bow 1, Candles, Embellishment 3, Key, Leaves, Ring, Rose 2,Rose 3, Rose 4, Shoe, String of Roses, Tulip 1 and Tulip 2 for the key I used Embellishemt 4 and erased the diamond and the chain and attached the key to the bow resizing as necessary.
Place each element where you think it looks best make it your own.

Give each layer a drop shadow 3, 3, 50, 5

Image – Resize – All Layers checked 500 x 500 Smart size

Add the artists copyright and your watermark then add your name I used the Font Boulevard using a colour to match the kit and giving it a Stroke of 1 with a gold colour

You can save as a Jpeg now if you don’t want to animate if you wish to animate carry on below

ANIMATION

Click on the Glitter Petals layer in your palette and Effects – EyeCandy 5 – Brushed Metal with the settings below:

Settings: Hand Brushed Metal

Basic:
Hand Brushed
Direction – 0
Highlight Sharpness – 50
Grain Contrast – 40
Grain Length – 23.62
Brush Size – 118.11
Brush Density – 60
Brush Variation – 45

I also used the freehand selection tool and outlined the hearts on Embellishment 3 and used VM – Natural – Sparkle with settings:

Size – 20
Red – 200
Green – 175
Blue – 160
RND Colour on/off: 255
Random Seed: 100

I then made the ring layer active and did the same with VM – Natural – Sparkle with the same settings

Now copy merged and take it to Animation Shop and Paste as a new animation – back in PSP undo everything you did with the effects and do the same again keeping all the same settings but clicking the random button in each effect and in the VM – Natural – Sparkle slide the Random seed button to 120 – Copy merged and in AS paste after the current frame and back to PSP and undo it all again and then redo clicking on the random button again and with the sparkle slide the random seed button to 140.

You should now have three frames in AS click on the first frame and Edit – Select all and click on Animation – animation properties and click on Opaque and change the colour to white click on View to view your animation and if happy Save as a Gif and your done.

I hope you enjoyed this tutorial and if you have a go please leave a little luv it’s nice to know if you enjoy it

Many thanks for trying my tutorial.

Lyn

Friday 21 August 2009

MY NEW LAYOUT

Hope you all like my new layout it was made by Catarific of www.catarificspaintshoppro.blogspot.com the only problem I am having is that it cuts off the Tags posted from Photoshop and I don't know how to get round it, It posts okay when I post an image direct from my PC but then the animations don't show, any how I will work on it and see if I can sort it out and if anyone has any ideas on how to fix this please give me a shout or email me and let me know.

I also just wanted to say thanks to all of you who have had a go at my tutorials and I know I have been a bit slow at posting new ones lately but our business relies on tourism and it has been booming over the summer holidays so I haven't had much time for anything but hopefully it will quieten down soon and I can get back to doing what I love best PSP YAAAAAAA!!!! lol

Anyway leave a little luv if you try my Tuts I like to know I am not putting a lot of hard work in for nothing lol

Keep Tutting away lol and I promise I will be posting a new Tut soon.

Lyn X

Wednesday 12 August 2009

SWEET AS CANDY


SWEET AS CANDY

This tutorial was written by me, and any resemblance to any other tutorial is purely coincidental.

It would be nice if you let me know you have tried my tutorials I love to see what you do with them, send me a copy and I will add them to my slide show.

Supplies needed:

PSP (I used PSP 9)
Animation Shop

Tube of choice I am using the beautiful artwork of Keith Garvey if you wish to use his artwork then you need to purchase a license from www.mypsptubes.com

The Scrap kit I used is by Monica of Simply Sensational Scraps…. thank you Monica and is called Antique Beauty (FTU) and you can get it http://simplysensationalscraps.blogspot.com

The mask I used is WSL_Mask116 by Chelle thanks again Chelle http://weescotslasscreations.blogspot.com thanks again Chelle


Okay lets get started

Open a new image 700 x 700 we can resize later flood fill white
Add a new raster layer and copy and paste a paper of your choice I used paper 06 then Layers – Load/Save Mask – Load Mask From Disk and look for WSL_Mask116 and apply – right click on the group layer in your layer palette and merge group.

Copy and paste the flowerswirl1 and dropshadow place it to the top right of the Tag duplicate it 3 times so you have 4 and place them at the 4 corners of the Tag (see mine for reference) then copy and paste sunflower 1 and again duplicate it 7 times so you have 8 and place then in a square overlapping each other now copy and paste Frame 5 on top of the sunflowers.

Click inside the frame with your magic wand and Selections – Modify and Expand by 5 then copy and paste a paper of your choice I used Paper 18 – Selections – invert and hit delete on your keyboard then drop the paper layer below the frame.

Now add your tube I resized by 150% and using your eraser tool remove any overhanging at the bottom of the frame

Add whatever Elements you want it’s your choice I used Blossom 1 & 2 resizing the second one slightly, Beads 3, lilies 1 and bow 1, Brad1 resizing as necessary I also added a couple of butterflies.
Place each element where you think it looks best, make it your own.

Give each layer a drop shadow 3, 3, 50, 5

Image – Resize – All Layers checked 500 x 500 Smart size

Add your copyright and watermark then add your name I used the Font Aquarelle using a colour to match the kit and giving it a Stroke of 1

You can save as a Jpeg now if you don’t want to animate if you wish to animate carry on below

ANIMATION

Click on the Mask layer and Adjust – Add / Remove Noise – guassian checked and set the the percentage to 25% click okay then copy merged and take it to Animation Shop – Edit and paste as a new animation – Back in PSP and click undo once then do the same again but change the percentage to 30% take it to AS and paste after the current frame – back in PSP click undo once and add noise again changing the percentage to 35%.

In AS click on Animation – animation properties and Opaque checked and change the colour to white click okay then View your animation and if happy save as a Gif. And your done.

Many thanks for trying my tutorial.

Lyn

Wednesday 8 July 2009

I WANT YOU


This tutorial was written by me, and any resemblance to any other tutorial is purely coincidental

Supplies needed:

PSP (I used PSP 9)
Animation Shop
Filter Xenofex 2 – Constellation

Font I used : Al Sandra

Drop shadow used throughout is 5, 5, 50, 5


Tube of choice I am using the fantastic artwork of Jennifer Janesko if you wish to use her artwork then you need to purchase a license at CILM HERE

The Template No.: 50 is from Simone at http://www.sophisticatsimonepsptutorials.comHERE

Masks from weescotslass Chelle http://www.weescotlasscreations.blogspot.com – WSL_Mask 167 & 187, thanks again Chelle you can get them HERE

Scrapkit is called Masquerade and you can get it from http://myjuicybits.blogspot.com HERE

Put your masks in your mask folder.

Open your template and delete the copyright layer, click on the background layer and Image – Canvas size and increase it to 700 x700 and flood fill white (we can resize later)

Click on the paper layer in your layer palette Selections – Select all – Selection – Float – Selection – Defloat, copy and paste a paper of your choice (I used paper 5)
Selections – invert and hit delete on your keyboard, now delete the original paper layer.

Do the same with Layers : 3 strips, Rectangle, Oval, Bow Ribbon & Stitch using papers of your choice (I used Paper 18, Paper 17, Paper 21, Paper 14 and Paper 7 respectively)

Now make your oval layer active and Selections – Select all – Selection – Float – Selection – Defloat and add your tube resizing if necessary then Selections – invert and hit delete on your keyboard

Make your white background layer active and copy and paste a paper of your choice I used Paper 6 and *Layers – Load/Save Mask – Load mask from disc and look for WSL_Mask 167 and apply then right click on Group layer in your layer palette and merge group* Then copy and paste paper of your choice again I used Paper 5 and do the same from * to * but using WSL_Mask 187 you might have to stretch both Mask Layers using your Raster Deform Tool and I rotated WSL_Mask 187 left by 45%

Now add whatever Elements you like I used Flowers 1, 2 and 3 resizing them by 50% and I used Bows 5 & 7 placing them one on top of each other.

Make the top Group Layer active and copy and paste the Enamel Splatter 01 resizing by 50% and place it at top right of your Tag then copy and paste Enamel Splatter 02 again resizing by 50% and place it left bottom I flipped Enamel Splatter 02 for the effect I wanted but it’s your choice.

I also added the diamond ( which I had in my supplies, I’m sure you have it too) to the centre of the flowers again it’s your choice.

Now resize to 550 x 550 and add the artists copyright and your watermark.

If you have added the diamonds then right click on the top one and merge down and do it again so you have the diamonds on the one layer now X out that layer click on one of the other layers and Merge Visible – Un X the diamond layer.

Add your name using one of the papers in your background and the foreground on black with a stroke of 1 solid line.

If you are happy with your Tag and don’t wish to animate then Merge all and save as a Jpeg.

Animation

Click on your diamond layer and Effects – Xenofex2 – Constellation and use these settings 1.98, 50, 50, 25, 50, 75 and make sure Keep Original Image is checked now copy merged and take it to AS and Edit – Paste as a new animation, * back in PSP click undo and apply the filter again but click on the random button and copy merged and in AS Edit – Paste – Paste after current frame *, do the same again from * to * then Animation – Animation Properties and make sure opaque is checked and change the colour to white click ok

View your animation and if happy Save as a Gif and your done.

Thank you for trying my tutorial and if you liked it give me a shout in my Cbox.

Lyn

Sunday 28 June 2009

DREAM LOVER


DREAM LOVER

This tutorial was written by me, and any resemblance to any other tutorial is purely coincidental

Supplies needed:

PSP (I used PSP 9)
Animation Shop

Filter used – Alien Skin – Xenofex 2

2 Tubes of choice from the same artist I am using the FANTASTIC!!! artwork of Keith Garvey if you wish to use his artwork then you need to purchase a license from http://www.mypsptubes.com HERE

The Scrap kit I used is by Vaybs of Designs By Vaybs…. thank you Vaybs and is called Roses (FTU) and you can get it HERE

The Template I used Missy_tagtemplate129 is by Missy of devineintentionz.blogspot.com and you get it HERE
The mask I used is WSL_Mask181 by weescotlass Chelle …..thank you again Chelle and you can get it HERE

My Supplies HERE

Drop shadow used throughout 3, 3, 50, 5 black


Okay lets get started

Open Tagtemplate 129 and Shift D to copy it and close the original, now click on the background layer and Image – Canvas size 700 x 700 and floodfill white. Delete the Watermark layer.

Open your supplies and minimise & put your Mask in your Mask folder

Click on the square layer in your layer palette and Selections – Select all – Selections – Float – Selections Defloat and copy and paste a paper of your choice I used Paper 3 from the kit, Selections – invert and hit the delete key on your keyboard, Delete the original Selections – None now do the same with Rectangle & Dotted Line.

Click on the Circle 1 and Selections – Select all – Layers – add a new raster layer and in your material palette click on the pattern tab and look for the glitter you would like to use and fill the circle with the Glitter Pattern, Selections – None & Delete the original layer do the same with Circle 2.

Click on the Wordart layer in your layer palette and Selections – Select all – Selections – Float – Selections – Defloat – Add a new raster layer and floodfill with a colour from the tube you are going to use then delete the original layer.

Right click on the top circle layer and – Merge down so your 2 circles are on one layer.

In your layer palette make the rectangle layer active and add your tube as a new layer resizing if necessary then click on your top layer and add your second tube again resizing if necessary.

Copy and paste the heartline from the kit and place it to the left of your Tag and I resized by 80% then – duplicate and mirror image.

Make the background layer active and floodfill with the same colour you used for the wordart and Layers – Load/Save Mask – Load Mask from Disk and look for Chelles Mask 181 and apply then in your layer palette right click on the Group layer and Merge Group

Add a dropshadow to all layers except the mask layer

Image – Resize to 550 x 550 smart size.

Add the artists copyright and then add your Name if using the same tube I used I placed my name as if the tube was resting on top of it.

If you are happy with your Tag as it is you can now save it as a Jpeg and your done, if you wish to animate it then carry on below.

ANIMATION

Click on the circles layer in your layer palette and Effects – Xenofex 2 – Constellation with these settings :
1.98
50
50
25
50
75
Keep Original Image – checked and apply then copy merged and take it to animation shop – Edit and paste as a new animation – * back in PSP and click undo then Effects – Xenofex 2 – Constellation and with the same settings hit the random button once and apply and copy merged and in AS – Edit and paste after current frame do the same again from *

View your Tag and if happy save as a Gif and your done.

Thank you for trying my tutorial and if you enjoyed it please leave me a thanks in my Cbox.

Lyn

Saturday 20 June 2009

CHIANTI


CHIANTI

This tutorial was written by me, and any resemblance to any other tutorial is purely coincidental

Supplies needed:

PSP (I used PSP 9)
Animation Shop

Tube of choice I am using the exceptionally beautiful artwork of Jennifer Janesko if you wish to use her artwork then you need to purchase a license at CILM HERE

The Scrap kit I used is by Aiya of Juicy Bits…. thank you Aiya and is called Chianti (FTU) and you can get it HERE

The mask I used is WSL_Mask59 by weescotlass Chelle …..thank you again Chelle and you can get it HERE

The sunrise pic is one I took so use one that you have

Drop shadow used throughout 3, 3, 50, 5 black


Okay lets get started

Open a new image 700 x 700 ….we can resize later

Copy and paste Paper 01 from the kit and apply WSL_Mask59 right click on the group layer in your layers palette and merge group.

Copy and paste Frame 01 now click inside the frame with your magic wand then Selections – modify and expand by 4 now copy and paste a paper of your choice then Selections – Invert and hit delete on your keyboard, drop the paper layer below the frame layer and drop shadow the frame.

Make the Frame layer active and again click inside it with your magic wand add a new raster layer and copy and paste the sunrise pic into the selection and drop the pic layer below the frame layer but above the paper layer.

Add your tube, resizing if you have to and drop shadow and place it to the right hand side of the frame now add whatever elements you would like or use the ones I used (see mine for reference) I used Blossom 1 and 2, Feather Cluster, Flower 04 & 05, and Glass 1, I also copied and pasted above the group layer the Doodle 1 and the Dot Splatter and placed them so they show around the frame, drop shadow them all, I also resized the garter 1 and placed it on the tubes leg.

Image – resize to 550 x 550 making sure all layers is checked and use smartsize.

Add the artists copyright and watermark and add your name I used the font Al Sandra size 48 and added a stroke of 1 in white.

You can x out the white background layer for posting on forums etc then merge all layers visible and save as a Jpeg and your done.

Many thanks for taking the time to try this Tutorial

Lyn

Friday 19 June 2009

TEQUILA SUNRISE


TEQUILA SUNRISE

This tutorial was written by me, and any resemblance to any other tutorial is purely coincidental

Supplies needed:

PSP (I used PSP 9)
Animation Shop

Tube of choice I am using the beautiful artwork of Sonia Roji if you wish to use her artwork then you need to purchase a license at http://www.mypsptubes.com HERE

The Scrap kit I used is by Aiya of Juicy Bits…. thank you Aiya and is called Tequila Sunrise (FTU) and you can get it HERE

The mask I used Vix_mask 363 and you can get it http://www.freewebs.com HERE

You will also need a Diamond Circular Frame to add which I'm sure you will all have in your own supplies somewhere, I cannot supply as I had it is in another scrapkit I have sorry

Okay lets get started

Open a new image 700 x 700 we can resize later flood fill white
Add a new raster layer and copy and paste a paper of your choice I used paper 03 then Layers – Load/Save Mask – Load Mask From Disk and look for Vix_Mask 363 and apply – right click on the group layer in your layer palette and merge group.

Copy and paste the Glitter Doodle then copy and paste Frame 1 on top of Frame 1 I added the 2 diamond Frames using the raster deform tool to line them up the way I wanted them – merge Frame 1 and the 2 diamond frames together.

Click inside the frame with your magic wand and Selections – Modify and Expand by 4 then copy and paste a paper of your choice I used Paper 07 – Selections – invert and hit delete on your keboard then drop the paper layer below the frame.

Add whatever Elements you wantto the left of the Frame it’s your choice I used Blossom 1 & 2 resizing the second one slightly, Flowers 2 & 4 and the leaves – I then added Bow 1 to the right of the Frame resizing all elements as necessary.

Add your tube and place her as if she is sitting in the Frame but over the Flowers.

Give each layer a drop shadow 3, 3, 50, 5

Image – Resize – All Layers checked 500 x 500 Smart size

Add artists copyright and watermark then add your name I used the Font Cherish using a colour to match the kit and giving it a Stroke of 1

You can save as a Jpeg now if you don’t want to animate if you wish to animate carry on below

ANIMATION

Click on the frame layer and Adjust – Add / Remove Noise – guassian checked and set the the percentage to 25% click okay now click on the Glitter Doodle in your layer palette and add noise again at the same settings the copy merged and take it to Animation Shop – Edit and paste as a new animation – Back in PSP and click undo 3 times then do the same again on your Frame layer and the Glitter Doodle layer but change the percentage to 30% take it to AS and paste after the current frame – back in PSP click undo 3 times and add noise again to both layers changing the percentage to 35%.

In AS click on Animation – animation properties and Opaque checked and change the colour to white click okay then View your animation and if happy save as a Gif. And your done.

Many thanks for trying my tutorial.

Lyn

Sunday 14 June 2009

APHRODITE


This tutorial was written by me, and any resemblance to any other tutorial is purely coincidental

Supplies needed:

PSP (I used PSP 9)
Animation Shop

Tube of choice I am using the fantastic artwork of Jennifer Janesko if you wish to use her artwork then you MUST purchase a license at CILM HERE

Mask is another great one from weescotslass Chelle – WSL_Mask 59, thanks again Chelle you can get it http://weescotslasscreations.blogspot.com HERE

Scrapkit is called Aphrodite and you can get it at http://myjuicbits.blogspot.com HERE

Put your mask in your mask folder

Open a new image 700 x 700 we can resize later, flood fill with white add a new layer and flood fill with the same colour as your frame – f7d3bb and layers – Load/Save Mask – Load Mask From Disk and look for WSL_Mask 59 in the drop down menu and apply You might need to stretch it a bit using your Raster deform tool

Copy and paste as a new layer the frame 2 and click inside it with your magic wand Selections – modify and expand by 4 pick a paper from the scrapkit and resize it to500 x 500 add a new layer and paste the paper into the selection Selections – none
Drop the paper layer under your frame and drop shadow the frame 3, 3, 50, 5

Resize Flower 4, 5 and 6 by 70% and place them under your frame to the right but above the mask (see mine for reference) merge all 3 flowers together and duplicate on the original Adjust – Blur – Guassian and set the radius to 20 on the top layer drop shadow with the same settings as before.

Copy and paste the paint splash and place it to the left again under the frame but above the Mask.

Now add your tube place her where you think she looks best and drop shadow.

Add whatever elements you would like resizing and placing them on the left above the frame and give them a drop shadow I used Blossom 1 and 2, Blossom 5, Bow 5, Flower 9 and 11

Resize all layers to 500 x 500 and then add artists copyright and your watermark.

Add your name I used Boulevard font on size 70 with a number 1 stroke and stretched it a bit pick colours to match your image and drop shadow.
If you are not going to animate then Layers – Merge all and flatten and save as a Jpeg

If you have used the same or similar tube and would like to animate then carry on.

Make your tube the active layer and using your Freehand Selection tool carefully select which part you want to animate
You might have to zoom in to do this I closed off some elements to make sure I could see all that had to be selected.

Once you have selected Adjust – Add/Remove Noise – Add noise – Guassian set to 25% and monochrome checked click ok and Selections none, copy merged and paste into animation shop as a new animation, back in psp click undo twice and do the same as above but change it to 30% Selections – none and copy merged edit and paste in AS after the current frame back in PSP and again click undo twice and change the noise to 35% and copy merged and in AS Edit and paste after the current frame.

You now have 3 frames go to Edit – Select all then Animation – animation properties – check Opaque and change the colour to white and click okay.

View your animation and if happy save as a Gif and your done.

Thank you for trying my tutorial I hope you enjoyed it and give me a shout in my cbox and let me know how you got on.

Wednesday 10 June 2009


SUMMER NIGHTS

This tutorial was written by me, and any resemblance to any other tutorial is purely coincidental

Supplies needed:

PSP (I used PSP 9)
Animation Shop

Tube of choice I am using the beautiful artwork of Dean Yeagle if you wish to use his artwork then you need to purchase a license from CILM HERE

The Scrap kit I used is by "Rebecca's Scrapping Silliness" …. thank you Rebecca and is called Summer Evening (FTU) and you can get it HERE

The Template I used is by Missy, thanks Missy, Missy_tagtemplate 138
HERE

The mask I used WSL_Mask 154 and you can get it HERE

Supplies: HERE

Put the mask in your mask folder

Open up Missy_tagtemplate138 and shift D to duplicate it and close off the original, delete the top two layers (copyright info and the brackets layer) and then click on the background layer – Image/Canvas size and change it to 700 x 700 and flood fill with white we can resize it later.

Add a new raster layer and Selections - select all and copy and paste into selection paper 1 from the scrapkit now find your mask and apply it then in your layers palette right click on the group layer and merge group then drop the opacity to 50%, Selections – none. Drop shadow

Make square 1 in your layer palette active and Selections – all, Selections – float, Selections – defloat and copy and paste a paper of your choice into Selection and Selections – none. Drop shadow

Do the same with square2 and your cicles and with the wordart SWEET
I chose paper 3 for square 2, paper 1 for the circles and paper 5 for the wordart but please make your own choice. Drop shadow all

Copy and paste the leaf border resizing it 10% and place on the left of the yellow square drop shadow it and duplicate it and Image – mirror.

Click on the group layer and resize 25% and copy and paste ribbon 5 and drop shadow.

Copy and paste and resize whatever elements you wish to use from the kit I used Popflower 1, Flower 1 and Flower 3, Butterfly 1 and 3 drop shadow them all.

Copy and paste your tube placing it below the circles layer and using your eraser remove any of the tube that is showing below the circles. Drop shadow your tube.

I then typed out Summer with the Chopin font and then typed out Nights with chilli’s pepper font and I used Boulevard for my name at the top of the Tag, drop shadow all. You can use whatever wording you like.

Resize your Tag to 500 x 500 and put your copyright info.

Open up Animation Shop.

In PSP copy merged your Tag and take it to AS Edit and paste as a new animation, duplicate it till you have 20 frames.

Open up your 01fairybetterfly Gif and click on the first frame then Edit – Select all – Edit – Copy

Click on the first frame of your tag and Edit – Select all and paste into selected frame place it where you think it looks best you can Edit and paste into selected frame as many times as you like I did it three times. View your animation and if happy save as a Gif and your done.

Thank you for trying my tutorial and if there is anything I can help with give me a shout.

Lyn

Friday 5 June 2009


THE DENIM BLUES

This tutorial was written by me, and any resemblance to any other tutorial is purely coincidental

Supplies needed:

PSP (I used PSP 9)
Animation Shop

2 Tubes of choice from the same artist I am using the beautiful artwork of Keith Garvey if you wish to use his artwork then you need to purchase a license from http://www.mypsptubes.com HERE

The Scrap kit I used is by "Rebecca's Scrapping Silliness" …. thank you Rebecca and is called Denimetal, unfortunately Rebecca has now made this Scrapkit (PTU) sorry but this was out of my control if you would still like to use it it can be purchased at http://mylifeandscrap.com HERE

The mask I used WSL_Mask 84 and you can get it at http://weescotslasscreations.blogspot.com HERE

Fonts used: Blobfont for the name and Angular for the circle

Open a new image 700 x 700 (we can resize later) flood fill white

Copy and paste a paper of choice and apply WSL_Mask84 in layer palette right click and merge group resize, copy and paste Funky Star 1 from the kit then resize and copy and paste funky star 2 free rotate this a bit so funky star 1 is showing drop shadow both with 3,3,50,5 copy and paste chain frame and using your raster deform tool bring it in to sit on top of the metal circle bit on the frame (see mine for reference) and drop shadow.

Using your magic wand click inside the metal circle and Selections – modify and expand by 4 copy and paste a paper of your choice then Selections – invert and hit delete on your keyboard, drop the paper below the circle Selections – None.

Do the same with the tube you are using and drop the opacity to 60 and then do the same with the chicken wire but leave the opacity at 100.

Copy Ribbon2 resizing it and paste it under the Funky star1 and Funky star2 but above your mask layer and move it up to the top left drop shadow as above and duplicate it then image flip and image mirror place it so you just see the edges of it (see mine) then resize Doodle2 and copy and paste it placing it to the right and up a bit drop shadow and duplicate then image flip and image mirror.

Click on your top layer in your layer palette then copy and paste your main tube and place her to the right and drop shadow.

Copy and paste the Tag resizing it and mirroring it and place it over the doodle
And erase parts so it looks as though it’s looped over it.

Copy and paste whatever elements of your choice I used Butterfly 1 and Flower 2 ( resizing as necessary) and adding the same drop shadow.
Using your Elipse tool set at circle foreground colour set to white and background set to any colour as we will be deleting this later draw out a cicle so it covers all your tag then Objects – align – Centre in Canvas then click on your text tool now hover over the edge of the cicle till you get the “A” with a curve and type whatever you want I typed “ I GOT THE DENIM BLUES” and use the kerning to adjust your type when happy in your layer palette click on the little plus sign to the left of the vector layer and it will open up and you will see 2 layers under the vector 1 layer one is the wording you have just typed and one is the circle you want to close off the circle so it doesn’t show so click on the eye next to that layer and it will disappear then click on the minus sign that is now to the left of the vector layer and it will close off the other layers leaving you with the circle of words you typed.
You can resize now I use 500 x 500

Add your name to the Tag and add artists copyright and watermark.

Now click on the mask layer in your layer palette and Adjust – Add / Remove noise Guassian, Monochrome checked and set to 35% and okay and copy merged into AS and Edit paste as a new animation, back in PSP and click undo then Add noise and set the % to 40 and copy merged into AS and Edit paste after current frame and again back in PSP and click undo then Add noise and change the % to 45% and copy merged take it to AS and Edit paste after current frame – Edit – Select all and Animation – animation properties and set it to opaque – white and click okay.

View your animation and if happy save as a GIF. And your done.

Thank you for trying my tutorial.

Lyn
Thursday 28 May 2009

ALL THAT GLITTERS


ALL THAT GLITTERS

This tutorial was written by me, and any resemblance to any other tutorial is purely coincidental

Supplies needed:

PSP (I used PSP 9)
Animation Shop

Tube of choice I am using the FANTASTIC artwork of Keith Garvey if you wish to use his artwork then you need to purchase a license from MPT

The Scrap kit I used is by Yvette …. Thanks Yvette….at misfits scrapz and is called Bling A Ling(FTU) and you can get it HERE

The mask I used WSL_Mask 181 and you can get it HERE

Filters used:
Eye Candy 5 – impact – brushed metal

Unzip your supplies and put the mask into your mask folder

Drop shadow used throughout 5, 5, 50, 5

Open a new image 700 x 700 we can resize later flood fill white
Copy and paste paper 4 from the kit or a paper of your choice
Layers – Load/save mask – Load mask from disk and look for the mask WSL_Mask 181 in the drop down menu and apply in your layer palette right click on the group layer and merge group.

Copy and paste the BlingALing Frame 3 and click inside it with your magic wand then Selections – Modify and Expand by 4 and copy and paste paper 1 then Selections – Invert and hit delete on your keyboard – Selections – None, move the paper layer under the frame and rename this layer Back in your layer palette and drop shadow the frame.

Copy and paste your tube and Duplicate it now move the duplicated one below your frame layer and then click on the top tube layer and using your eraser delete the parts overlapping the frame add a drop shadow to the tube below the frame.

Add and resize ( I resized by 50%) any elements of your choice or (see mine for reference) adding a drop shadow to them all, I added the glitter doodle and placed it top right under the frame duplicated it then mirror and flip and I did the same with the BlingALing tiedstring 1 placing it top left and mirror and flip I then merged the 2 glitter doodles together and renamed this layer glitter doodle in the layer palette.
Image resize to 500 x 500 using smartsize and with resize all layers checked then type out your name in a scripty font of your choice and add the artists copyright and watermark.

If you are happy with your Tag as it is now then save as a Jpeg and your done……… if you would like to animate your Tag then carry on below.

If like me you added the flowers with the diamonds then merge them down together and rename the layer flowers.


Now you have 4 layers named :

Flowers
Frame
Back
Glitter Doodle

Make your flower layer active in the layer palette and with your magic wand and the shift key held down slect the diamond on the flowers back to your layer palette click on Frame and still holding your shift key down select the diamonds on the frame, click on your glitter doodle layer and go to Adjust – Add/Remove Noise with guassian and monochrome checked and noise set to 25% click ok then click on the frame layer and do the same again and again on the flower layer then Selections None.

Click on the Layer Back in your layer palette and Effects – Plugins – Alien Skin Eye Candy 5 Impact – Brushed Metal Settings – Basic Tab as below:

Hand Brushed – checked
Direction – O
Metal Colour – silver grey
50, 40, 23.62, 118.11, 60, 45

and okay then copy merged and take it to animation shop and Edit – paste as a new animation then ** back in PSP undo all that you have done on the Flowers, Frame and Glitter doodle and the Back but Keep selected and Image Add/Remove noise again but change the noise to 30% and do it all over again to each layer and when it comes to the BACK leave all settings as they are and just click the random button and copy merged and take it to animation shop and Edit – paste after current frame and do the same again from ** right in animation shop click on animation – animation properties and with opaque checked and change the colour to white and okay View your Tag and if happy save as a GIF and your done.

Wednesday 27 May 2009

Unfortunately for some strange reason Photobucket decided that My Beautiful Tag violated their terms of use so I have had to post the Tag straight from my PC so there is no animation showing here.

Lyn X

Tuesday 26 May 2009

BEAUTIFUL


BEAUTIFUL

This tutorial was written by me, and any resemblance to any other tutorial is purely coincidental

Supplies needed:

PSP (I used PSP 9)
Animation Shop

Tube of choice I am using the beautiful artwork of Jennifer Janesko if you wish to use her artwork then you need to purchase a license at CILM HERE

The Scrap kit I used is by Jessica at Scraps By Jessica …. thank you Jessica and is called Moments Like This (FTU) and you can get it HERE

The first mask I used WSL_Mask 181 and you can get it athttp://weescotslasscreations.blogspot.com HERE
The second mask I used Vix_Mask 02 and you can get it at http://www.freewebs.com HERE

Filters used:
Eye Candy 5 – impact – brushed metal

Unzip your supplies and put the masks into your mask folder

Open a new Image 700 x 700 and flood fill white
Copy and paste paper 9 from the kit (or choose your own)
Then Layers – Load/Save Mask – Load mask from disk and look
WSL_Mask 181, fit to layer, source luminance, fit to layer all checked
Invert transparency unchecked and okay, right click the group layer in your layer palette and merge group and then do the same again with the Vix_Mask 02 after merging the Vix Mask group use your Raster Deform Tool to stretch it (see mine for reference)

Copy and paste Goldframe_1 resizing it by 80% click inside the frame with your magic wand and Selections- modify and expand by 4 then copy and paste a paper of your choice (I chose paper 7) then Selections - invert and hit delete on your keyboard and drop the paper layer under the frame layer, Selections – none and give your frame a drop shadow of your choice

Copy and paste your tube (I chose a sitting tube and placed her sitting on the edge of the frame) but you could use a tube from the waist and erase any parts that overlap the frame.

Add and resize any elements of your choice (see mine for reference) I also added the floweronstiches below the paper & frame but above the 2 masks.

Add artists copyright and watermark then add your name I used font Bluenote.

If you are happy with your Tag and don’t wish to animate then Layers and merge & flatten and save as a Jpeg and your done if you would like to animate your Tag then carry on below.

Animation

Click on the paper behind the frame and Effects – plugins – Alien Eye Candy 5 Impact – Brushed Metal with the settings below

Hand Brushed
Direction – 0
Metal Colour – same colour as your paper behind the frame
50
40
23.62
118.11
60
45
and okay, copy merged and paste into animation shop as a new animation
back in PSP and click undo once and apply the filter again but click the random button once and again copy merged and edit & paste into AS after the current frame, do the same again remembering to click the random button again and paste after the current frame.

Edit, select all then Animation, animation properties, click opaque and colour white and okay then frame properties and change the display time to 15, view your animation and if happy save as a GIF and your done.

Many thanks for trying my tutorial.

Saturday 16 May 2009


PROVOCATIVE

This tutorial was written by me, and any resemblance to any other tutorial is purely coincidental

Supplies needed:

PSP (I used PSP 9)
Animation Shop

Tube of choice I am using the fantastic artwork of Keith Garvey if you wish to use his artwork then you need to purchase a license from MPT

The Scrap kit I used is by Missy… at http://misfitsscrapz.blogspot.com. thank you Missy and is called Glitter My Fancy (FTU) and you can get it HERE

Template 192 I used is also by Missy of http://divineintentionz.blogspot.com…thank you again and you can get it HERE

Mask_363 is by Vix at http://www.freewebs.com and you can get it HERE


Open all the supplies and put the mask in your mask folder.

Open Missy’s template 192 and shift D to copy and close the original
Delete the info layer in your layer palette and the click on the background layer then image – canvas size 800 x 800 ( we can resize later) still on the background layer flood fill the extra bit with white.

Click on Raster 1 in your layer palette and Selections – Select all, Selections – Float, Selections Defloat, copy and paste a paper of your choice (I used paper 10) from the kit as a new layer then Selections – invert and hit your delete button on your keyboard, Selections – none and add a drop shadow of 3, 3, 50, 5 and delete the original
Do the same with all the other layers and then for the word art open the glitter and minimize it and then look for it in your patterns in the material palette and with your magic wand click on each letter holding down the shift button and then flood fill with the glitter then add drop shadow.

Open the tube you are using and copy and paste it as a new layer (resizing if necessary) and place it in the center of your image, add any embellishments you like or see my Tag as reference. resizing and giving everything a drop shadow
Now click on the background in your layer palette and copy and paste a paper of your choice then Layer – Load/Save mask from disk and look for the mask in the drop down menu making sure Source luminance, Fit to Layer and Hide all Mask is checked, invert mask is unchecked and click okay, right click on Group in your layer palette and Merge Group now do the same again using a different colour paper and then Image rotate – free rotate 45% right and Merge Group.

Look for the glitter doodle 3 in the kit and copy and paste it, placing it at the top and then duplicate it and Image flip then Image mirror moving them slightly so they are to your liking.

Click on the top glitter doodle in your layer palette and merge down and again merge down to the mask and again to the first mask so they are all on one layer and rename the merged layer “ Doodles” also if you have used the key chains like I have then merge the two together and rename the layer key chain.

Resize all layers to 500 x 500 then add artists copyright and name * and if you are happy with your Tag and don’t want to animate it then merge all layers and save as a jpeg and your done.

If you prefer to animate then lets carry on from *

Click on the Doodles layer in your layer palette and go to Adjust – add/remove noise – add noise, Guassian and monochrome checked and Noise at 25% and okay, you can also do the same with your key chain layer now, then copy merged and take it to Animation Shop and paste as a new animation, back to PSP and click undo three times and do it all again but this time set the percentage to 30% and again take it to Animation Shop and paste after the current frame and again back in PSP click undo three times and do it one more time changing the percentage to 35% and copy merged and paste it after the current frame in animation shop.

View your animation and if happy with it then save as a Gif and your done!

Thank you for having a go at my tutorial.

Hugs

Lyn

Thursday 23 April 2009

SUMMER


This tutorial was written and designed by me and any resemblance to any other tutorial is purely coincidental.

Tube of your choice I am using the beautiful artwork of Keith Garvey to use his work you must purchase a license from http://mypsptubes.com HERE

Unfortunately I cannot share my supplies so you will need to supply the ones listed below

Supplies needed:

Mask, Beaded word art, Butterfly, Flower, Flower Doodle & Mask
Template from 195 from missy of http://divineintentionz.blogspot.com HERE

Font used Cecily

Okay lets get started!

Unzip all the supplies in PSP and minimise

Open the template in PSP, shift D to copy and close off the original- delete the copyright layer and click on the background layer in your layers palette then image – canvas size and change to 700 x 700 still on your background layer flood fill with white, still on your background layer add a new raster layer and floodfill with a colour from your tube then Layers – new mask from image and look for UFMask2 with source luminance and invert mask checked – apply then in your layer palette right click on group and merge group then in your layer palette click on the circle background layer and :

Selections – Float, Defloat add a new layer and flood fill with a colour of your choice
Selections – None and delete the original, do this with, Circle Frame, Background Frame and Frame leaving the dotted lines as they are.

Copy and paste the tube of your choice and place her to the right of your Tag resizing if necessary now resize and add what elements you want to place where you want to or see mine for reference I placed mine to hide the cut off of my tubes legs, copy and paste the summer beaded wordart and place it on top of the background frame.

Now add the artists copyright and your name and save as Jpeg and your done.

Many thanks for trying my tutorial.