Thursday 22 October 2009

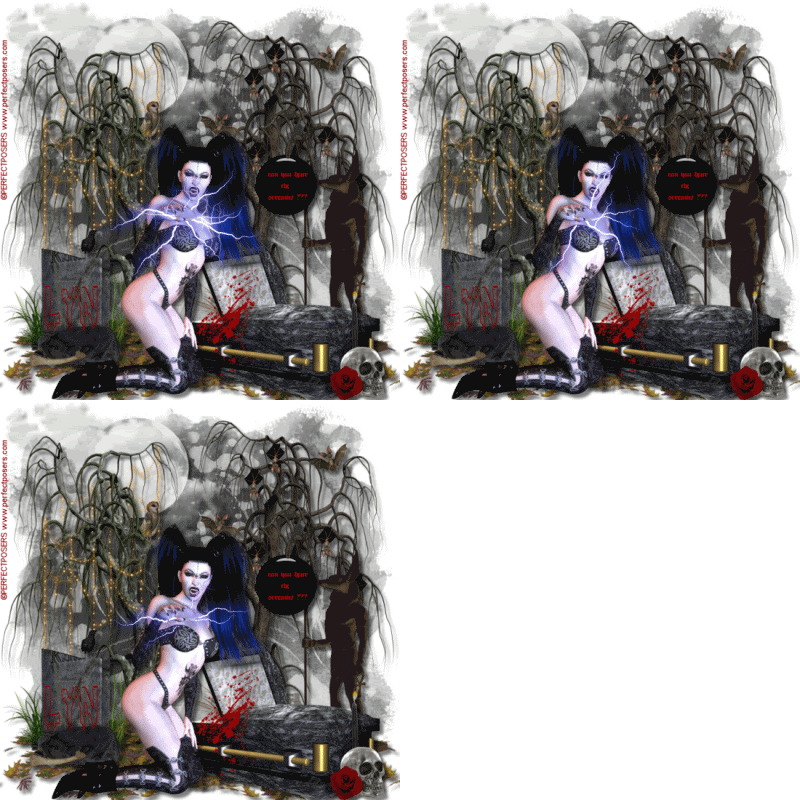
FANGTASTIC

Photobucket

Fangtastic

This tutorial was written by me, and any resemblance to any other tutorial is purely coincidental

Supplies needed:

PSP (I used PSP 9)
Animation Shop

Filter used – Alien Skin Xenofex 2 - Electrify

A tube of choice I am using the lovely artwork of © Perfect Posers www.perfectposers.com

Scrap kit I used is by http://digicats.blogspot.com/search/label/Freebie and is (FTU) till Hallows Eve

The mask I used is WSL_Mask_254 by weescotlass Chelle …..thank you again Chelle and you can get it at http://weescotslasscreations.blogspot.com/


Drop shadow used throughout 3, 3, 50, 5 black


Okay lets get started

Open a new image 700 x 700 and floodfill white.

Open your supplies and minimise & put your Mask in your Mask folder


Copy & paste paper 19 and Image –Load/Save Mask – Load mask from disk and look for WSL_Mask254 and apply in your layer palette right click on group and Merge – Merge Group, drop the opacity to 80%

Copy and paste Shrouded Moon resize and place on the top left of your Tag and drop shadow, copy and paste Spooky Tree 03 resizing by 70% or as necessary and place to the left of the tag (see mine for reference) copy and paste Spooky Tree 04 again resizing and place to the right Copy & paste Leaves I duplicated them twice and flipped one layer space them out at the front, now copy and paste the Anibus resize at 70% and place to the right then copy and paste Coffin 1 resize @ 70% and place in front of the Anibus Copy and paste Tombstone 04 resize at 70% and again at 80% and place to the left of the Tag, copy and paste Skull Candle Black resizing by 50% and place in front of the coffin, copy and paste Screams Flair resizing by 50% twice hang it on a branch of the tree and using your eraser make it look as if it’s hanging from the tree, Copy and paste Blood Splatter 03 and resize by 50% place it where you think it looks good.

Now copy and paste your tube of choice I resized by 80%

Give all layers a drop shadow and Image resize all layers to 550 x 550

Add the artists copyright and add your name I used Liquidism and placed my name over the tombstone.

If you are happy with your Tag then save as a Jpeg and your done.

You don’t have to use all the elements I have you choose which ones you want to use and make it your own

If you wish to animate then carry on.

In PSP activate the tube layer in your layer palette and using your magic wand select each fingernail then Effects – Plug-ins - Xenofex2 – Electrify
And using these settings below :

10
85
40
60
60
100
make sure Radiate from centre is checked and okay

Selections – none Edit – Copy merged and take it to Animation Shop and Edit – Paste as a new animation, back in PSP and click undo twice and do the same again but clicking the random button, Selections – none and Edit – Copy merged and take it to AS and Edit – paste after the current frame and for the third time do it all again and hit the random button and Selections – none and Edit – Copy merged and take it to AS and Edit paste – after the current frame.

Edit – Select all then Animation – Animation properties and click opaque and change the colour to white – click okay then Animation – Frame properties and change the Display time to 15, View your animation and if happy save as a Gif and your done.

Thank you for trying my tutorial and if you liked it please leave a few words in my chatbox I love to hear how you get on.

Hugs X Lyn

Tuesday 6 October 2009

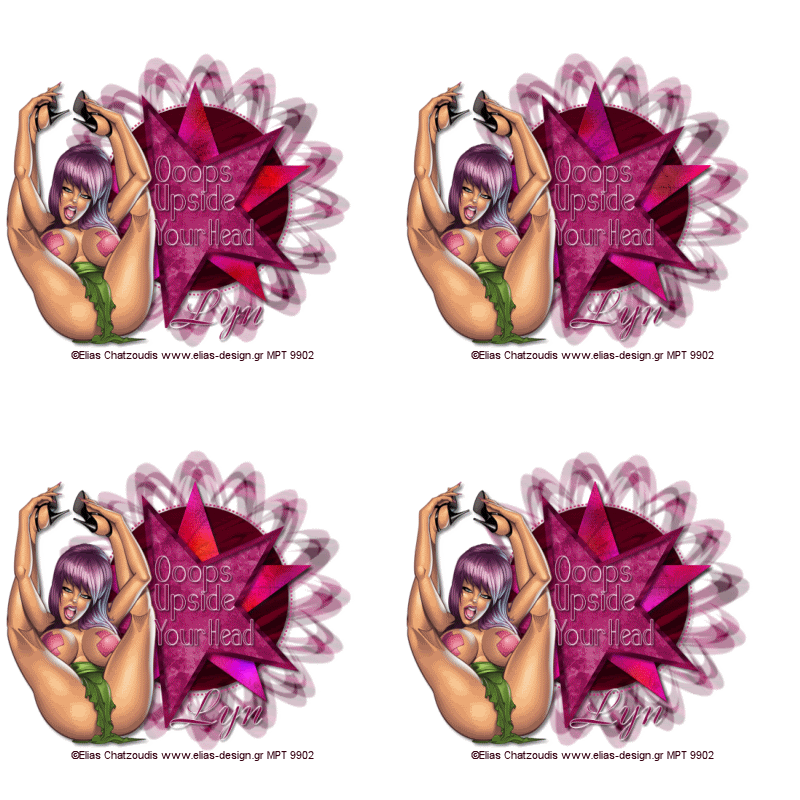
OOPS UPSIDE YOUR HEAD

Photobucket

Ooops Upside Your Head

This tutorial was written by me, and any resemblance to any other tutorial is purely coincidental

Supplies needed:

PSP (I used PSP 9)
Animation Shop

Filters: Eyecandy 4000 - HSB Noise

Tube of choice I am using the beautiful artwork of Elias Chatzoudis if you wish to use his artwork then you need to purchase a license from http://www.mypsptubes.com/

The Scrap kit I used is Burgundy Grunge by Terry from http://treasuresbyterry.blogspot.com/ …. thank you Terry

The Template I used is by Missy of http://divineintentionz.blogspot.com/thanks Missy, Missy_tagtemplate 200


The mask I used WSL_Mask 91 another fantastic mask from Chelle at http://weescotslasscreations.blogspot.com/ and you can get it


Put the mask in your mask folder

Open up Missy_tagtemplate 200 and shift D to duplicate it and close off the original, delete the copyright info and then click on the background layer – Image/Canvas size and change it to 700 x 700 and flood fill with white we can resize it later.

Add a new raster layer and Selections - select all and copy and paste into selection paper 1 from the scrapkit now find your mask and apply it then in your layers palette right click on the group layer and merge group.

Make Circle in your layer palette active and Selections – all, Selections – float, Selections – defloat and copy and paste a paper of your choice into Selection and Selections – none. Drop shadow

Do the same with the dotted circle, star, star background and Star frame
I chose paper 2 for circle paper 16 for the star, paper 9 for star background, paper 7 for the frame and paper 5 for the dotted circle. Drop shadow all

Copy and paste your tube placing it to the left of the Tag.
Drop shadow your tube.

I then typed out Oops Upside Your Head with the Aquarelle font and then typed my name I used Boulevard with a stroke of 1 for my nameand put it at the bottom of the Tag, drop shadow all. You can use whatever wording you like.

Resize your Tag to 500 x 500 and put the artists copyright info.


Open up Animation Shop.

In PSP copy merge your Tag and take it to AS Edit and paste as a new animation , back to Psp and click on the Star layer in your layer palette and duplicate it twice so you have 3 copies click on the first copy and Effects- Eyecandy 400 – HSB Noise and with the default settings click okay now click on the second copy and do the same again but this time click the random seed button and okay then click on the third copy and again hit the random seed button X out your 2nd and 3rd copies now click on the group layer and using your Raster deform tool turn the mask slightly to the right then copy merged and take it to AS and Edit paste after the current frame now back in PSP and X out your first copy of the star and un X the second copy click on your group layer and again with your raster deform tool turn the mask slightly again then copy merged and take it to AS do the same again this time X out the 1st and 2nd copies and un X the third copy using the raster deform tool again turn the mask slightly to the right and copy merged into AS you should now have 4 frames – Edit – Select all then Animation – Animation properties click on opaque and change the colour to white and okay.

View your Tag and if happy save as a Gif and your done.

Thank you again to everyone who tries my tutorial please leave a few words in my Cbox to let me know what you think.

Lyn X

Sunday 4 October 2009

JUST FOR YOU


Just For You

This tutorial was written by me, and any resemblance to any other tutorial is purely coincidental

Supplies needed:

PSP (I used PSP 9)
Animation Shop

Filter used – Alien Skin – Eye Candy 5 – Textures - Diamond Plate

A tube of choice I am using the FANTASTIC!!! artwork of Keith Garvey if you wish to use his artwork then you need to purchase a license from http://www.mypsptubes.com

The Scrap kit I used is by Mar at http://scrappingmar.blogspot.com…. thank you Mar and is called Just For You (FTU)

The mask I used is WSL_Mask192 by weescotlass Chelle …..thank you again Chelle and you can get it at http://weescotslasscreations.blogspot.com/
I have also added a bow that I had but you will have to supply your own I’m sure you have many to choose from

Drop shadow used throughout 3, 3, 50, 5 black


Okay lets get started

Open a new image 700 x 700 and floodfill white.

Open your supplies and minimise & put your Mask in your Mask folder


Copy & paste Freebie 1 paper and Image –Load/Save Mask – Load mask from disk and look for WSL_Mask192 and apply in your layer palette right click on group and Merge – Merge Group you might have to stretch the mask a bit using the Raster Defom Tool to get it to show under the Frame (see mine for reference)

Copy and paste Freebie 35 ribbon frame resizing I resized by 20% make sure your frame layer is active and using your magic wand click inside the frame then Selections – Modify – Expand by 3 and copy and paste Freebie 6 paper then Selections – invert and hit delete on your keyboard, Selections – None - drop the paper layer below the frame and making the frame layer active add a drop shadow.

Copy and paste your tube and place it over your frame – Duplicate the tube and drop the duplicated tube layer below the frame and on the original using your eraser - erase away all bits of your tube that overlap the frame.

Now comes the good bit start adding any elements you like resizing them by 20% and place them where you think they look good, I added Freebie 13, Freebie 16, Freebie 23, and I added Freebie 11 just under the frame to the left using the Raster deform tool to turn it round till I got it to where I wanted it.

Add a drop shadow to all layers except the mask layer.

Image – Resize to 550 x 550 smart size.

Add the artists copyright and then add your Name I used Aquarelle Font with a stroke of 1 and watermark.

If you are happy with your Tag as it is you can now save it as a Jpeg and your done, if you wish to animate it then carry on below.

ANIMATION

Click on the mask layer in your layer palette and Effects – Alien Skin / Eye Candy 5 – Textures / Diamond Plate - with these settings :
16
3.25
65
35
60
0
75
Texture Orientation 45

Click Okay and then copy merged and take it to animation shop – Edit and paste as a new animation – * back in PSP and click undo then Effects Alien Skin / Eye Candy 5 – Textures / Diamond Plate –and with the same settings hit the random button once and apply and copy merged and in AS – Edit and paste after current frame do the same again from *

Once you have the 3 frames in AS then Click on Animation – then Animation Properties make sure Opaque is checked and change the colour to white and apply then Animation – Frame properties and change it to 15.

View your Tag and if happy save as a Gif and your done.

Thank you for trying my tutorial and if you enjoyed it please leave me a thanks in my Cbox.

Lyn