Sunday 28 June 2009

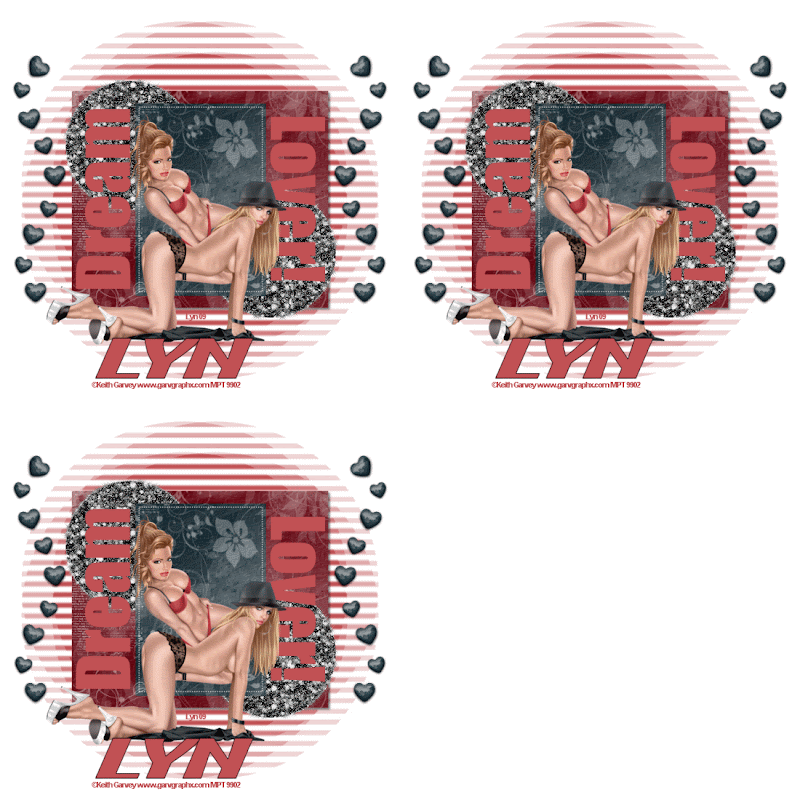
DREAM LOVER


DREAM LOVER

This tutorial was written by me, and any resemblance to any other tutorial is purely coincidental

Supplies needed:

PSP (I used PSP 9)
Animation Shop

Filter used – Alien Skin – Xenofex 2

2 Tubes of choice from the same artist I am using the FANTASTIC!!! artwork of Keith Garvey if you wish to use his artwork then you need to purchase a license from http://www.mypsptubes.com HERE

The Scrap kit I used is by Vaybs of Designs By Vaybs…. thank you Vaybs and is called Roses (FTU) and you can get it HERE

The Template I used Missy_tagtemplate129 is by Missy of devineintentionz.blogspot.com and you get it HERE
The mask I used is WSL_Mask181 by weescotlass Chelle …..thank you again Chelle and you can get it HERE

My Supplies HERE

Drop shadow used throughout 3, 3, 50, 5 black


Okay lets get started

Open Tagtemplate 129 and Shift D to copy it and close the original, now click on the background layer and Image – Canvas size 700 x 700 and floodfill white. Delete the Watermark layer.

Open your supplies and minimise & put your Mask in your Mask folder

Click on the square layer in your layer palette and Selections – Select all – Selections – Float – Selections Defloat and copy and paste a paper of your choice I used Paper 3 from the kit, Selections – invert and hit the delete key on your keyboard, Delete the original Selections – None now do the same with Rectangle & Dotted Line.

Click on the Circle 1 and Selections – Select all – Layers – add a new raster layer and in your material palette click on the pattern tab and look for the glitter you would like to use and fill the circle with the Glitter Pattern, Selections – None & Delete the original layer do the same with Circle 2.

Click on the Wordart layer in your layer palette and Selections – Select all – Selections – Float – Selections – Defloat – Add a new raster layer and floodfill with a colour from the tube you are going to use then delete the original layer.

Right click on the top circle layer and – Merge down so your 2 circles are on one layer.

In your layer palette make the rectangle layer active and add your tube as a new layer resizing if necessary then click on your top layer and add your second tube again resizing if necessary.

Copy and paste the heartline from the kit and place it to the left of your Tag and I resized by 80% then – duplicate and mirror image.

Make the background layer active and floodfill with the same colour you used for the wordart and Layers – Load/Save Mask – Load Mask from Disk and look for Chelles Mask 181 and apply then in your layer palette right click on the Group layer and Merge Group

Add a dropshadow to all layers except the mask layer

Image – Resize to 550 x 550 smart size.

Add the artists copyright and then add your Name if using the same tube I used I placed my name as if the tube was resting on top of it.

If you are happy with your Tag as it is you can now save it as a Jpeg and your done, if you wish to animate it then carry on below.

ANIMATION

Click on the circles layer in your layer palette and Effects – Xenofex 2 – Constellation with these settings :
1.98
50
50
25
50
75
Keep Original Image – checked and apply then copy merged and take it to animation shop – Edit and paste as a new animation – * back in PSP and click undo then Effects – Xenofex 2 – Constellation and with the same settings hit the random button once and apply and copy merged and in AS – Edit and paste after current frame do the same again from *

View your Tag and if happy save as a Gif and your done.

Thank you for trying my tutorial and if you enjoyed it please leave me a thanks in my Cbox.

Lyn

Saturday 20 June 2009

CHIANTI


CHIANTI

This tutorial was written by me, and any resemblance to any other tutorial is purely coincidental

Supplies needed:

PSP (I used PSP 9)
Animation Shop

Tube of choice I am using the exceptionally beautiful artwork of Jennifer Janesko if you wish to use her artwork then you need to purchase a license at CILM HERE

The Scrap kit I used is by Aiya of Juicy Bits…. thank you Aiya and is called Chianti (FTU) and you can get it HERE

The mask I used is WSL_Mask59 by weescotlass Chelle …..thank you again Chelle and you can get it HERE

The sunrise pic is one I took so use one that you have

Drop shadow used throughout 3, 3, 50, 5 black


Okay lets get started

Open a new image 700 x 700 ….we can resize later

Copy and paste Paper 01 from the kit and apply WSL_Mask59 right click on the group layer in your layers palette and merge group.

Copy and paste Frame 01 now click inside the frame with your magic wand then Selections – modify and expand by 4 now copy and paste a paper of your choice then Selections – Invert and hit delete on your keyboard, drop the paper layer below the frame layer and drop shadow the frame.

Make the Frame layer active and again click inside it with your magic wand add a new raster layer and copy and paste the sunrise pic into the selection and drop the pic layer below the frame layer but above the paper layer.

Add your tube, resizing if you have to and drop shadow and place it to the right hand side of the frame now add whatever elements you would like or use the ones I used (see mine for reference) I used Blossom 1 and 2, Feather Cluster, Flower 04 & 05, and Glass 1, I also copied and pasted above the group layer the Doodle 1 and the Dot Splatter and placed them so they show around the frame, drop shadow them all, I also resized the garter 1 and placed it on the tubes leg.

Image – resize to 550 x 550 making sure all layers is checked and use smartsize.

Add the artists copyright and watermark and add your name I used the font Al Sandra size 48 and added a stroke of 1 in white.

You can x out the white background layer for posting on forums etc then merge all layers visible and save as a Jpeg and your done.

Many thanks for taking the time to try this Tutorial

Lyn

Friday 19 June 2009

TEQUILA SUNRISE


TEQUILA SUNRISE

This tutorial was written by me, and any resemblance to any other tutorial is purely coincidental

Supplies needed:

PSP (I used PSP 9)
Animation Shop

Tube of choice I am using the beautiful artwork of Sonia Roji if you wish to use her artwork then you need to purchase a license at http://www.mypsptubes.com HERE

The Scrap kit I used is by Aiya of Juicy Bits…. thank you Aiya and is called Tequila Sunrise (FTU) and you can get it HERE

The mask I used Vix_mask 363 and you can get it http://www.freewebs.com HERE

You will also need a Diamond Circular Frame to add which I'm sure you will all have in your own supplies somewhere, I cannot supply as I had it is in another scrapkit I have sorry

Okay lets get started

Open a new image 700 x 700 we can resize later flood fill white
Add a new raster layer and copy and paste a paper of your choice I used paper 03 then Layers – Load/Save Mask – Load Mask From Disk and look for Vix_Mask 363 and apply – right click on the group layer in your layer palette and merge group.

Copy and paste the Glitter Doodle then copy and paste Frame 1 on top of Frame 1 I added the 2 diamond Frames using the raster deform tool to line them up the way I wanted them – merge Frame 1 and the 2 diamond frames together.

Click inside the frame with your magic wand and Selections – Modify and Expand by 4 then copy and paste a paper of your choice I used Paper 07 – Selections – invert and hit delete on your keboard then drop the paper layer below the frame.

Add whatever Elements you wantto the left of the Frame it’s your choice I used Blossom 1 & 2 resizing the second one slightly, Flowers 2 & 4 and the leaves – I then added Bow 1 to the right of the Frame resizing all elements as necessary.

Add your tube and place her as if she is sitting in the Frame but over the Flowers.

Give each layer a drop shadow 3, 3, 50, 5

Image – Resize – All Layers checked 500 x 500 Smart size

Add artists copyright and watermark then add your name I used the Font Cherish using a colour to match the kit and giving it a Stroke of 1

You can save as a Jpeg now if you don’t want to animate if you wish to animate carry on below

ANIMATION

Click on the frame layer and Adjust – Add / Remove Noise – guassian checked and set the the percentage to 25% click okay now click on the Glitter Doodle in your layer palette and add noise again at the same settings the copy merged and take it to Animation Shop – Edit and paste as a new animation – Back in PSP and click undo 3 times then do the same again on your Frame layer and the Glitter Doodle layer but change the percentage to 30% take it to AS and paste after the current frame – back in PSP click undo 3 times and add noise again to both layers changing the percentage to 35%.

In AS click on Animation – animation properties and Opaque checked and change the colour to white click okay then View your animation and if happy save as a Gif. And your done.

Many thanks for trying my tutorial.

Lyn

Sunday 14 June 2009

APHRODITE


This tutorial was written by me, and any resemblance to any other tutorial is purely coincidental

Supplies needed:

PSP (I used PSP 9)
Animation Shop

Tube of choice I am using the fantastic artwork of Jennifer Janesko if you wish to use her artwork then you MUST purchase a license at CILM HERE

Mask is another great one from weescotslass Chelle – WSL_Mask 59, thanks again Chelle you can get it http://weescotslasscreations.blogspot.com HERE

Scrapkit is called Aphrodite and you can get it at http://myjuicbits.blogspot.com HERE

Put your mask in your mask folder

Open a new image 700 x 700 we can resize later, flood fill with white add a new layer and flood fill with the same colour as your frame – f7d3bb and layers – Load/Save Mask – Load Mask From Disk and look for WSL_Mask 59 in the drop down menu and apply You might need to stretch it a bit using your Raster deform tool

Copy and paste as a new layer the frame 2 and click inside it with your magic wand Selections – modify and expand by 4 pick a paper from the scrapkit and resize it to500 x 500 add a new layer and paste the paper into the selection Selections – none
Drop the paper layer under your frame and drop shadow the frame 3, 3, 50, 5

Resize Flower 4, 5 and 6 by 70% and place them under your frame to the right but above the mask (see mine for reference) merge all 3 flowers together and duplicate on the original Adjust – Blur – Guassian and set the radius to 20 on the top layer drop shadow with the same settings as before.

Copy and paste the paint splash and place it to the left again under the frame but above the Mask.

Now add your tube place her where you think she looks best and drop shadow.

Add whatever elements you would like resizing and placing them on the left above the frame and give them a drop shadow I used Blossom 1 and 2, Blossom 5, Bow 5, Flower 9 and 11

Resize all layers to 500 x 500 and then add artists copyright and your watermark.

Add your name I used Boulevard font on size 70 with a number 1 stroke and stretched it a bit pick colours to match your image and drop shadow.
If you are not going to animate then Layers – Merge all and flatten and save as a Jpeg

If you have used the same or similar tube and would like to animate then carry on.

Make your tube the active layer and using your Freehand Selection tool carefully select which part you want to animate
You might have to zoom in to do this I closed off some elements to make sure I could see all that had to be selected.

Once you have selected Adjust – Add/Remove Noise – Add noise – Guassian set to 25% and monochrome checked click ok and Selections none, copy merged and paste into animation shop as a new animation, back in psp click undo twice and do the same as above but change it to 30% Selections – none and copy merged edit and paste in AS after the current frame back in PSP and again click undo twice and change the noise to 35% and copy merged and in AS Edit and paste after the current frame.

You now have 3 frames go to Edit – Select all then Animation – animation properties – check Opaque and change the colour to white and click okay.

View your animation and if happy save as a Gif and your done.

Thank you for trying my tutorial I hope you enjoyed it and give me a shout in my cbox and let me know how you got on.

Wednesday 10 June 2009


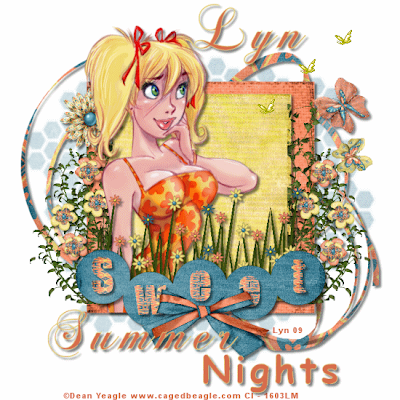
SUMMER NIGHTS

This tutorial was written by me, and any resemblance to any other tutorial is purely coincidental

Supplies needed:

PSP (I used PSP 9)
Animation Shop

Tube of choice I am using the beautiful artwork of Dean Yeagle if you wish to use his artwork then you need to purchase a license from CILM HERE

The Scrap kit I used is by "Rebecca's Scrapping Silliness" …. thank you Rebecca and is called Summer Evening (FTU) and you can get it HERE

The Template I used is by Missy, thanks Missy, Missy_tagtemplate 138
HERE

The mask I used WSL_Mask 154 and you can get it HERE

Supplies: HERE

Put the mask in your mask folder

Open up Missy_tagtemplate138 and shift D to duplicate it and close off the original, delete the top two layers (copyright info and the brackets layer) and then click on the background layer – Image/Canvas size and change it to 700 x 700 and flood fill with white we can resize it later.

Add a new raster layer and Selections - select all and copy and paste into selection paper 1 from the scrapkit now find your mask and apply it then in your layers palette right click on the group layer and merge group then drop the opacity to 50%, Selections – none. Drop shadow

Make square 1 in your layer palette active and Selections – all, Selections – float, Selections – defloat and copy and paste a paper of your choice into Selection and Selections – none. Drop shadow

Do the same with square2 and your cicles and with the wordart SWEET
I chose paper 3 for square 2, paper 1 for the circles and paper 5 for the wordart but please make your own choice. Drop shadow all

Copy and paste the leaf border resizing it 10% and place on the left of the yellow square drop shadow it and duplicate it and Image – mirror.

Click on the group layer and resize 25% and copy and paste ribbon 5 and drop shadow.

Copy and paste and resize whatever elements you wish to use from the kit I used Popflower 1, Flower 1 and Flower 3, Butterfly 1 and 3 drop shadow them all.

Copy and paste your tube placing it below the circles layer and using your eraser remove any of the tube that is showing below the circles. Drop shadow your tube.

I then typed out Summer with the Chopin font and then typed out Nights with chilli’s pepper font and I used Boulevard for my name at the top of the Tag, drop shadow all. You can use whatever wording you like.

Resize your Tag to 500 x 500 and put your copyright info.

Open up Animation Shop.

In PSP copy merged your Tag and take it to AS Edit and paste as a new animation, duplicate it till you have 20 frames.

Open up your 01fairybetterfly Gif and click on the first frame then Edit – Select all – Edit – Copy

Click on the first frame of your tag and Edit – Select all and paste into selected frame place it where you think it looks best you can Edit and paste into selected frame as many times as you like I did it three times. View your animation and if happy save as a Gif and your done.

Thank you for trying my tutorial and if there is anything I can help with give me a shout.

Lyn

Friday 5 June 2009


THE DENIM BLUES

This tutorial was written by me, and any resemblance to any other tutorial is purely coincidental

Supplies needed:

PSP (I used PSP 9)
Animation Shop

2 Tubes of choice from the same artist I am using the beautiful artwork of Keith Garvey if you wish to use his artwork then you need to purchase a license from http://www.mypsptubes.com HERE

The Scrap kit I used is by "Rebecca's Scrapping Silliness" …. thank you Rebecca and is called Denimetal, unfortunately Rebecca has now made this Scrapkit (PTU) sorry but this was out of my control if you would still like to use it it can be purchased at http://mylifeandscrap.com HERE

The mask I used WSL_Mask 84 and you can get it at http://weescotslasscreations.blogspot.com HERE

Fonts used: Blobfont for the name and Angular for the circle

Open a new image 700 x 700 (we can resize later) flood fill white

Copy and paste a paper of choice and apply WSL_Mask84 in layer palette right click and merge group resize, copy and paste Funky Star 1 from the kit then resize and copy and paste funky star 2 free rotate this a bit so funky star 1 is showing drop shadow both with 3,3,50,5 copy and paste chain frame and using your raster deform tool bring it in to sit on top of the metal circle bit on the frame (see mine for reference) and drop shadow.

Using your magic wand click inside the metal circle and Selections – modify and expand by 4 copy and paste a paper of your choice then Selections – invert and hit delete on your keyboard, drop the paper below the circle Selections – None.

Do the same with the tube you are using and drop the opacity to 60 and then do the same with the chicken wire but leave the opacity at 100.

Copy Ribbon2 resizing it and paste it under the Funky star1 and Funky star2 but above your mask layer and move it up to the top left drop shadow as above and duplicate it then image flip and image mirror place it so you just see the edges of it (see mine) then resize Doodle2 and copy and paste it placing it to the right and up a bit drop shadow and duplicate then image flip and image mirror.

Click on your top layer in your layer palette then copy and paste your main tube and place her to the right and drop shadow.

Copy and paste the Tag resizing it and mirroring it and place it over the doodle
And erase parts so it looks as though it’s looped over it.

Copy and paste whatever elements of your choice I used Butterfly 1 and Flower 2 ( resizing as necessary) and adding the same drop shadow.
Using your Elipse tool set at circle foreground colour set to white and background set to any colour as we will be deleting this later draw out a cicle so it covers all your tag then Objects – align – Centre in Canvas then click on your text tool now hover over the edge of the cicle till you get the “A” with a curve and type whatever you want I typed “ I GOT THE DENIM BLUES” and use the kerning to adjust your type when happy in your layer palette click on the little plus sign to the left of the vector layer and it will open up and you will see 2 layers under the vector 1 layer one is the wording you have just typed and one is the circle you want to close off the circle so it doesn’t show so click on the eye next to that layer and it will disappear then click on the minus sign that is now to the left of the vector layer and it will close off the other layers leaving you with the circle of words you typed.
You can resize now I use 500 x 500

Add your name to the Tag and add artists copyright and watermark.

Now click on the mask layer in your layer palette and Adjust – Add / Remove noise Guassian, Monochrome checked and set to 35% and okay and copy merged into AS and Edit paste as a new animation, back in PSP and click undo then Add noise and set the % to 40 and copy merged into AS and Edit paste after current frame and again back in PSP and click undo then Add noise and change the % to 45% and copy merged take it to AS and Edit paste after current frame – Edit – Select all and Animation – animation properties and set it to opaque – white and click okay.

View your animation and if happy save as a GIF. And your done.

Thank you for trying my tutorial.

Lyn