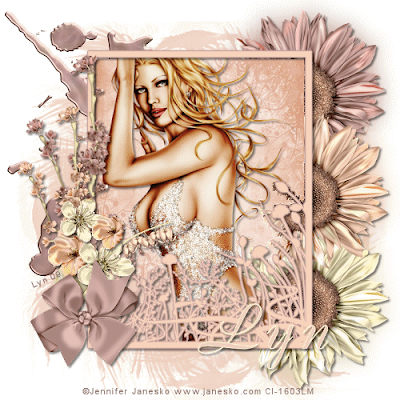
This tutorial was written by me, and any resemblance to any other tutorial is purely coincidental
Supplies needed:
PSP (I used PSP 9)
Animation Shop
Tube of choice I am using the fantastic artwork of Jennifer Janesko if you wish to use her artwork then you MUST purchase a license at CILM HERE
Mask is another great one from weescotslass Chelle – WSL_Mask 59, thanks again Chelle you can get it http://weescotslasscreations.blogspot.com HERE
Scrapkit is called Aphrodite and you can get it at http://myjuicbits.blogspot.com HERE
Put your mask in your mask folder
Open a new image 700 x 700 we can resize later, flood fill with white add a new layer and flood fill with the same colour as your frame – f7d3bb and layers – Load/Save Mask – Load Mask From Disk and look for WSL_Mask 59 in the drop down menu and apply You might need to stretch it a bit using your Raster deform tool
Copy and paste as a new layer the frame 2 and click inside it with your magic wand Selections – modify and expand by 4 pick a paper from the scrapkit and resize it to500 x 500 add a new layer and paste the paper into the selection Selections – none
Drop the paper layer under your frame and drop shadow the frame 3, 3, 50, 5
Resize Flower 4, 5 and 6 by 70% and place them under your frame to the right but above the mask (see mine for reference) merge all 3 flowers together and duplicate on the original Adjust – Blur – Guassian and set the radius to 20 on the top layer drop shadow with the same settings as before.
Copy and paste the paint splash and place it to the left again under the frame but above the Mask.
Now add your tube place her where you think she looks best and drop shadow.
Add whatever elements you would like resizing and placing them on the left above the frame and give them a drop shadow I used Blossom 1 and 2, Blossom 5, Bow 5, Flower 9 and 11
Resize all layers to 500 x 500 and then add artists copyright and your watermark.
Add your name I used Boulevard font on size 70 with a number 1 stroke and stretched it a bit pick colours to match your image and drop shadow.
If you are not going to animate then Layers – Merge all and flatten and save as a Jpeg
If you have used the same or similar tube and would like to animate then carry on.
Make your tube the active layer and using your Freehand Selection tool carefully select which part you want to animate
You might have to zoom in to do this I closed off some elements to make sure I could see all that had to be selected.
Once you have selected Adjust – Add/Remove Noise – Add noise – Guassian set to 25% and monochrome checked click ok and Selections none, copy merged and paste into animation shop as a new animation, back in psp click undo twice and do the same as above but change it to 30% Selections – none and copy merged edit and paste in AS after the current frame back in PSP and again click undo twice and change the noise to 35% and copy merged and in AS Edit and paste after the current frame.
You now have 3 frames go to Edit – Select all then Animation – animation properties – check Opaque and change the colour to white and click okay.
View your animation and if happy save as a Gif and your done.
Thank you for trying my tutorial I hope you enjoyed it and give me a shout in my cbox and let me know how you got on.


No comments:
Post a Comment