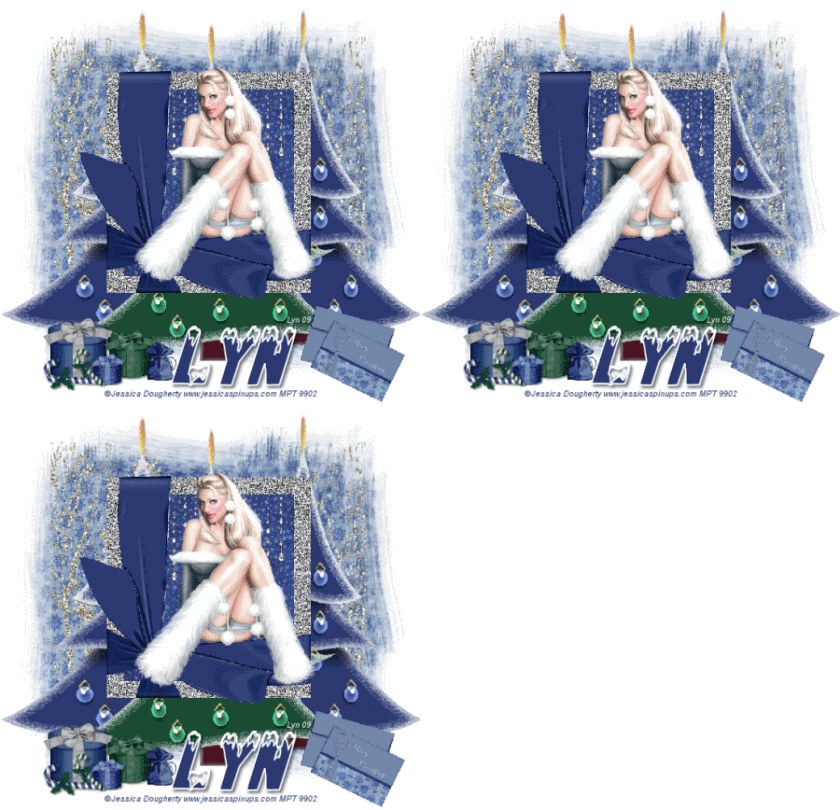
This tutorial was written by me and any resemblance to any other tutorial is purely coincidental.
It would be nice if you let me know you have tried my tutorials I love to see what you do with them, send me a copy and I will add them to my slide show.
Supplies needed:
PSP (I used PSP 9) but should work on any
Animation Shop
Tube of choice I am using the beautiful artwork of Jessica Dougherty if you wish to use her artwork then you need to purchase a license from: www.cilm.com
The Scrap kit I used is by Bel Vidotti and it’s called Christmas Around The World (FTU) and you can get it from: Bel Vidotti Scraps
The mask I used is WSL_Mask117 thanks Chelle and you can download it from her site http://weescotslasscreations.blogspot.com/ and the other Mask is Vix_Mask305 thanks Vix and you can download it from her site http://vixpsp.blogspot.com/
Okay lets get started
Open a new image 700 x 700 we can resize later flood fill white
Copy & Paste the Frame which is embellishment 04 – resize it by 50% twice and then by 80% and move it up slightly now with your magic wand click inside the frame making sure you get the little bits around the ribbon then Selections – Modify and Expand by 4 copy and paste a paper of choice I used paper 03 into selection – Select none and drop the paper below the frame and drop shadow the frame.
Make the Frame layer active and click inside with your magic wand again and Selections – Modify and expand by 4 then copy and paste resize if necessary your tube move it around till you get it just how you want it, if using the same tube as I did then I resized it by 80%
Now click on and make active your background layer and Copy and Paste a paper of your choice I used 05 then Layers – Load /Save Mask – Load Mask From Disk and look for WSL_Mask117 and apply – right click on the group layer in your layer palette and merge group I used the Raster Deform tool and stretched it a little on all sides now make your paper layer inside your frame active and copy and paste Element 51 resizing by 50% three times.
Make your background layer active and copy and paste element 18 resize it by 50% and then by 70% and place it to the left then duplicate it and Image – mirror copy and paste Element 17 resizing it by 50% and again by 70% and place in the middle of the other trees (see mine for reference) now copy and paste element 43 resizing it three times by 50% place it on the right and rotate it slightly add whatever presents you would like on the left resizing them all different
Make your Mask layer active and add a new layer then Selections – Select all and copy and paste the glitter paper 06 into selection – Select None then Layers – Load/Save Mask – Load Mask from Disk and look for Vix_Mask305 and apply, right click on the group layer in your layer palette and merge group
Add a drop shadow of your choice to all layers I use 3, 3, 50, 5, black
Image – Resize – All Layers checked 500 x 500 Smart size
Add the artists copyright and your watermark then add your name I used the Font Igloo Caps using a colour to match the kit and giving it a Stroke of 1 with your Fill on white
Animation
Click on your glitter mask layer and duplicate twice so you have 3 layers and click on the beads and do the same with your freehand selection draw round all the glitter parts of the frame that are showing when you have all the parts selected then duplicate twice so you should have 3 layers of the glitter mask, the beads and of the frame now X out 2 and 3 of each of the beads layer and the mask layer and the frame layer now Adjust – Add noise and set it to Guassian 30% now X out all the 1st layers and Un-X the second layers and do the same again but change it to 35% and ok and doing the same again with 1st and second layers X’d out and 3rd layer of all Un-X’d and this time change the % to 40 and okay.
View your Tag and if happy save as a Gif.
Thank you for trying my tutorial.
Lyn


No comments:
Post a Comment