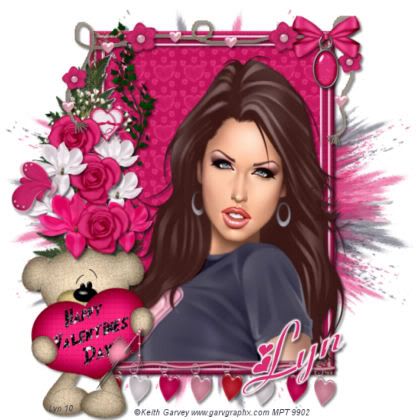
HAPPY VALENTINE'S DAY
This tutorial was written by me and any resemblance to any other tutorial is purely coincidental.
It would be nice if you let me know you have tried my tutorials I love to see what you do with them, send me a copy and I will add them to my slide show.
Supplies needed:
PSP (I used PSP 9) but should work on any
Tube of choice I am using the brilliant artwork of Keith Garvey if you wish to use his work then you must purchase a license from http://www.mypsptubes.com/
The Scrap kit I used is by Fantasy Moments it’s called For Your Love and you can get it : http://fantasymoments-scraps.blogspot.com
The mask I used is WSL_Mask38 thank you again Chelle and you can get it at: http://weescotslasscreations.blogspot.com/
Okay lets get started
Open a new image 700 x 700 we can resize later flood fill white
Copy & Paste the Frame (Element 23) I resized by 65% now with your magic wand click inside the frame and Selections – Select all – Modify and expand by 4 and copy and paste Paper 01 into selection - Select none and drop the paper layer below the frame and drop shadow the frame.
Now click on and make active your background layer add a new raster layer and flood fill it with a dark colour from your tube then Layers – Load/Save Mask – Load Mask from Disk and locate WSL_Mask38 and okay make the group layer active in your layer palette and right click and merge group (stretch the mask as necessary using the Raster Deform tool so it shows on all sides below the frame) now copy and paste a Paper from the scrapkit I chose Paper 18 and again Layers – Load/Save Mask – Load Mask from disk and click okay then make your second group layer in your layer palette active and right click and Merge Group you now have 2 Masks in different colours you can mirror and flip to get them the way you like stretch them a little if you want, now make your top layer in your layer palette active and copy and paste your close up tube place her to the right of the frame use your eraser tool to get rid of any overhand at the bottom of the frame now you can start adding whatever Elements you like I used Element 10, 19, 27, 32, 33, 43, 51, 65, 71 and 74 I resized them or use the Raster Deform Tool and also done I used Happy Valentines Day on the teddy’s heart cushion
Drop shadow each layer 3, 3, 50, 5, Black
Image – Resize – All Layers checked 500 x 500 Smart size
Add the artists copyright and your watermark
Now Merge – Layers Merge – Merge all (Flatten)
Now add your name I used the Font Fiolex Girls choosing a colour to match your Tag with a stroke of 1 then I used a gradient glow (you don’t have to do this).
Save your finished Tag as a Jpeg.


No comments:
Post a Comment