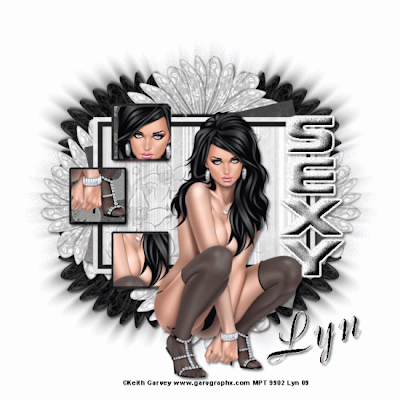
SEXY
This tutorial was written by me and any resemblance to any other tutorial is purely coincidental.
Supplies needed:
I am using the amazing artwork of Keith Garvey which you can purchase from http://mypsptubes.com HERE
Scrapkit I used is called Silver Shadow (FTU) from http://simplysensationalscraps.blogspot.com you can download it HERE
Template 31 you can download it from http://denzdesignz.blogspot.com HERE
Font I used is Boulevard
Filters
DSB Bright Noise
Eye Candy 4000 – Gradient Glow
Open the template and go to image – canvas size 700 x 700 then duplicate and close the original image, click on the bottom layer and flood fill white and delete the watermark and delete the layer that says BRINGING BACK
In your layer palette click on angle back 1 – selections, select all, float and defloat and copy and paste a paper of your choice then selections, invert and hit delete on your keyboard- select none and drop shadow 3,3,50,5 then delete the original.
Do the same as above to angle back 2, rectangle 3, rectangle 2, rectangle 1, small back 3, square 3, small back 2, square 2, small back 1 and square 1.
Copy and paste your tube of choice as a new layer and position slightly to the right of the Tag (see mine for reference) resizing if necessary and drop shadow with the same settings.
Click on the square1 in your layer palette and Selections, select all, float defloat, copy and paste your tube again resizing if necessary, position inside the part you have selected and hit delete on your keyboard do the same with square2 and square3.
Click on your bottom layer(white background) and copy and paste a flower clip and position it to the bottom left and drop shadow, duplicate it then image mirror, duplicate and image flip and again duplicate and image mirror.
Select another flower clip from the kit and paste as a new layer, position bottom centre, drop shadow and duplicate – image flip, duplicate and image – rotate, free rotate and 90 degrees right and position it then duplicate it and image mirror, now click on the top flower clip layer and merge down and keep merging down till they are all one layer then duplicate it, go to adjust – blur – radial blur and settings :
Blur type – Zoom
Blur – strength – 50
Eliptical – selected
Horizontal and vertical set to 0
Protect centre set to 25
Click okay, then duplicate this layer twice so you have 3 layers, on the first layer go to effects – plug ins – DSB Flux – bright noise – intensity 30 click mix once.
On your second layer do the same but click on mix twice and on the third layer click mix 3 times.
In your layer palette click on the word SEXY and with your magic wand click inside the letter S add a new raster layer and flood fill with a colour of choice, add an inner bevel settings :
Width 8
Smoothness 40
Depth 10
Ambience-5
Shininess 0
Angle 315
Intensity 52
Elevation 30
Colour white
Then go to effects, plug ins, Eye Candy 4000, gradient glow on the basic tab glow width 4, soft corners 25, opacity 100 the click the colour tab and click on fat and okay then drop shadow.
Click back on the word SEXY in your layer palette and do the same as above with letters E, X and Y and delete the original word SEXY, then go to your top letter and merge down each letter layer till it is one layer again and duplicate twice so you now have three layers click on the first layer and effects- plug ins DSB Flux – bright noise and click on mix once and okay do the same with the second layer and the third layer clicking on the mix twice on the second layer and three times on the third layer, you can go on and using your free selection tool and holding the shift key down select her jewelry and shoes etc and duplicate it twice and using the dsb flux plug in again on your selections or you can leave it as is.
Click on the top layer and add the artists copyright and your name now X out the second and third layer of the SEXY wordart and X out the second and third layer of the flower clips and copy merged and take it into animation shope and paste as a new animation
Back in PSP X out the 2 first layers and un X the second layers and copy merged into animation shop and edit paste after the current frame, back in PSP and X out the second layers and un X the third layers and again copy merged and take it to animation shop and edit – paste after the current frame.
View the Tag and if happy save as a Gif and your done.
Thank you for trying my tutorial.


No comments:
Post a Comment