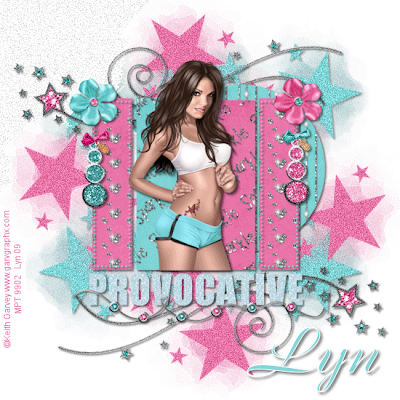
PROVOCATIVE
This tutorial was written by me, and any resemblance to any other tutorial is purely coincidental
Supplies needed:
PSP (I used PSP 9)
Animation Shop
Tube of choice I am using the fantastic artwork of Keith Garvey if you wish to use his artwork then you need to purchase a license from MPT
The Scrap kit I used is by Missy… at http://misfitsscrapz.blogspot.com. thank you Missy and is called Glitter My Fancy (FTU) and you can get it HERE
Template 192 I used is also by Missy of http://divineintentionz.blogspot.com…thank you again and you can get it HERE
Mask_363 is by Vix at http://www.freewebs.com and you can get it HERE
Open all the supplies and put the mask in your mask folder.
Open Missy’s template 192 and shift D to copy and close the original
Delete the info layer in your layer palette and the click on the background layer then image – canvas size 800 x 800 ( we can resize later) still on the background layer flood fill the extra bit with white.
Click on Raster 1 in your layer palette and Selections – Select all, Selections – Float, Selections Defloat, copy and paste a paper of your choice (I used paper 10) from the kit as a new layer then Selections – invert and hit your delete button on your keyboard, Selections – none and add a drop shadow of 3, 3, 50, 5 and delete the original
Do the same with all the other layers and then for the word art open the glitter and minimize it and then look for it in your patterns in the material palette and with your magic wand click on each letter holding down the shift button and then flood fill with the glitter then add drop shadow.
Open the tube you are using and copy and paste it as a new layer (resizing if necessary) and place it in the center of your image, add any embellishments you like or see my Tag as reference. resizing and giving everything a drop shadow
Now click on the background in your layer palette and copy and paste a paper of your choice then Layer – Load/Save mask from disk and look for the mask in the drop down menu making sure Source luminance, Fit to Layer and Hide all Mask is checked, invert mask is unchecked and click okay, right click on Group in your layer palette and Merge Group now do the same again using a different colour paper and then Image rotate – free rotate 45% right and Merge Group.
Look for the glitter doodle 3 in the kit and copy and paste it, placing it at the top and then duplicate it and Image flip then Image mirror moving them slightly so they are to your liking.
Click on the top glitter doodle in your layer palette and merge down and again merge down to the mask and again to the first mask so they are all on one layer and rename the merged layer “ Doodles” also if you have used the key chains like I have then merge the two together and rename the layer key chain.
Resize all layers to 500 x 500 then add artists copyright and name * and if you are happy with your Tag and don’t want to animate it then merge all layers and save as a jpeg and your done.
If you prefer to animate then lets carry on from *
Click on the Doodles layer in your layer palette and go to Adjust – add/remove noise – add noise, Guassian and monochrome checked and Noise at 25% and okay, you can also do the same with your key chain layer now, then copy merged and take it to Animation Shop and paste as a new animation, back to PSP and click undo three times and do it all again but this time set the percentage to 30% and again take it to Animation Shop and paste after the current frame and again back in PSP click undo three times and do it one more time changing the percentage to 35% and copy merged and paste it after the current frame in animation shop.
View your animation and if happy with it then save as a Gif and your done!
Thank you for having a go at my tutorial.
Hugs
Lyn


No comments:
Post a Comment